Quiz Maker - Help
Walk Through
Take the Walk ThroughCreating your Quiz
Choosing a Quiz Type Adding a Title or Logo Adding Questions Adding Pictures Adding Video, Audio and Links Question Types Question Behavior Question Display Question Logic Adding Answers Importing Answers Default Answers Using Previous AnswersPreview your Quiz
Preview your Quiz Preview your Quiz Results Reseting your QuizQuiz Results
Adding Outcomes Matching Answers to Outcomes Scoring your Quiz Adding Answer Explanations Adding Grades Changing your Result Type Add a Dynamic PDF to your resultsQuiz Themes
Selecting a Theme Customize your Theme Adding a Background Color or Picture Saving your ThemeQuiz Settings - Quiz
Changing Quiz Settings Page Breaks Randomize Question Order Adding a Progress Bar Auto Advance to next Question Showing/Hiding the back button Adding your quiz to 'Latest Quizzes'Quiz Settings - Results
Showing a Custom Thankyou Message Scoring as you go or at the end Reporting on all responses Showing the Comments Section Hiding Social Media Buttons Hiding the Location Map Hiding the vote numbers Receive emails after every response Adding a prize to your quizQuiz Settings - Lead Capture
Asking for an email before results Allow people to skip Lead Capture Change the Lead Capture questionsQuiz Settings - Advanced
Setting a Start and End date Blocking people from responding Translating your quiz Customizing buttons and error messages Post Responses to a custom URL Extend functionality with pluginsQuiz Settings - Integrate
Connecting to external Apps Adding Actions to your quizSharing / Publishing Quiz
Sharing via a Link Sharing via Facebook / Twitter Sharing your Public Results Embed your Quiz in a website Present your Quiz to a Live Audience Secure your quiz with Unique CodesYour Account
Signing Up for an Account Accessing your Account Forgot your Password Claiming a Poll or Quiz Login from the Share Tab Updating your Account Details Changing your Password Change your Subscription Canceling your Subscription Changing your Payment Method View your Invoices / Receipts Getting your API KeysManaging your Quizzes
Viewing your Active Quizzes Viewing your Stopped Quizzes Searching for a Quiz Editing an existing Quiz Publishing an existing Quiz Viewing your Results Viewing individual Responses Printing individual Responses Adding Responses to your Quiz Securing your Quiz Exporting Results to Excel/CSV/HTML Download Lead Capture Data Stopping your Quiz Clearing your Quiz Results Deleting your Quiz Creating a copy of your Quiz Deleting Individual ResponsesReporting
Filter Results by Question Filter by Country/Browser/Public Creating Custom Filters Viewing the Data table for a graph Change between Bar & Pie Chart Printing reports to PDF / Paper Viewing the response Timeline Viewing the response Map Viewing your CommentsFrequently Asked Questions
How do I know who has responded to my quiz? How do I add a name or email question? How do I change the way a Question displays or behaves? Can I print the Quiz to use as a paper test? Can I add an explanation of why an answer is correct / incorrect? Can I add a button to retake / start the quiz again? Can I print each response and show the correct / incorrect answers? Can I make a Poll with the Quiz Maker? Can I force respondents to enter text questions in a custom format? How do I show a subset of questions from a larger group How do I find the response with the top score and lowest time taken Can I integrate with other services, email etc... My quiz is taking a long time to load How do I change the Share link for Facebook, Twitter, etc... How do I stop questions overlapping images Can I A/B Test quiz questionsChoosing a Quiz Type
Choose a Quiz Type before you start making your quiz, this lets the Quiz Maker select all the right default for you and makes it much easier to get the result your looking for. You can of course change any settings you don't need later. If you hover over the 'Quiz Type' box you will see an arrow to the right, click it to see more quiz types.
Trivia / Marked Quiz
For a quiz that gives you a score and marks each question. By default it will mark each question immediately after answers, but you can change it to marking every question at the end

Personality / Type Quiz
For a quiz that gives you a fixed outcome at the end. You will be asked to specify each possible outcome for the quiz and match them up to your answers for each question in the quiz.

Survey / Other Quiz
For any other type of Quiz, this option sets the most generic defaults. If you still need Scoring / Outcomes you can add them on the Results tab, however this type is more for surveys.
Poll / Vote Quiz
For a simple poll or a quiz that you vote on. Selecting this option will change your button to say 'Vote' and allow you to (optionally) show a 'Results' button for your voters.

Adding a Title or Logo
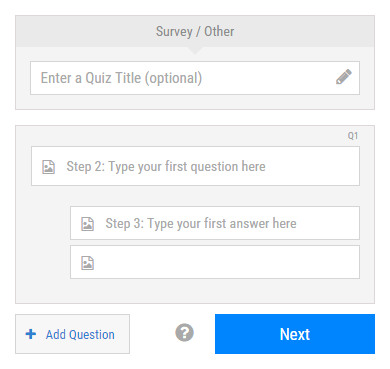
After you have selected your Quiz Type the 'Quiz Types' box will minimize and show just the title of the type you have chosen and underneath a new box will appear that says 'Enter a Quiz Title (optional)'.
Type your quiz title into this box - on your quiz it will appear at the top above the first question. If you have selected the 'Survey / Other' Quiz Type you will also see a pencil icon to the right of the box after you have clicked inside it. Click on this to add Advanced Content such as formatting, links, pictures or multimedia
Adding a Header / Logo
You can use the Quiz Title section to add branding such as a header or logo to the top of your quiz.
- Click inside the 'Quiz Title' so it has the focus
-
Click the pencil icon to the far right of the box
Please Note: The pencil icon is only visible when you select the 'Survey / Other' Quiz Type, however you can still use it for other quiz types by selecting the 'Survey / Other' quiz type before adding your advanced content - then just click 'Survey / Other' in the grey bar above the quiz title box and select the quiz type you actually want to use.
- A new 'Advanced Editor' window will open
- Click the picture icon to add a picture such as a logo or header graphic.
- You can also add links and multimedia from the 'Insert' menu
- Click 'OK' when you are done. The Quiz Title box will turn blue to show there is advanced content and you can click anywhere on it to reopen the Advanced Editor and modify the content.
Adding Questions
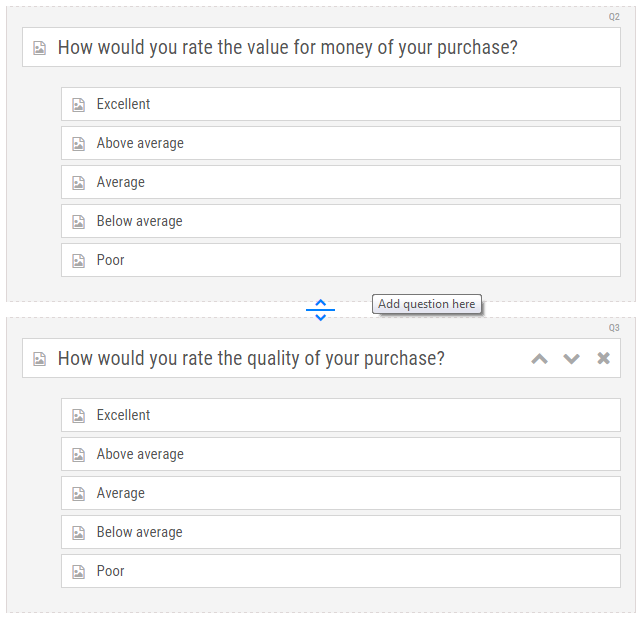
Click the 'Add Question' button at the bottom of the Quiz Creator to add a new question to the end of your quiz.
To add a question between two existing questions you can hover over the gap between the two questions and a blue arrow will appear. Click the blue arrow to add a new question in this spot.
Adding Pictures
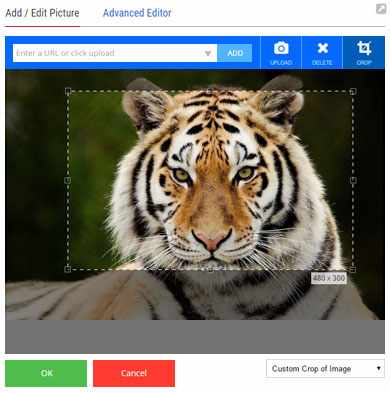
To the left of every question and answer text box is the 'Add Picture' icon - click it to open the add picture dialog.
Add from your Computer / Camera
Click the 'Upload' camera button to upload a photo from your Computer/Mobile or to take a photo from your mobile. Select the photo you want and then click ok.
Add from a website
Paste the URL of the picture you want into the white text box and click the 'Add' button to copy a picture from a URL.
Crop your picture
A crop box will appear when you add a picture so that your picture will be in the right dimensions for your quiz. Use the drag boxes in the corner to resize the crop section or click and drag to move it around. Only the area inside the dashed crop area will appear in your final picture.
Remove the picture crop
If you need to see the full picture you can remove the crop altogether by clicking the 'Crop' button in the top right - this will remove the crop window and show the full picture in your quiz.
Delete your picture
Click the 'Delete' button at the top of the window to remove your picture from your quiz - this will not delete any pictures off your computer or mobile.
Add Videos, Audio and Links
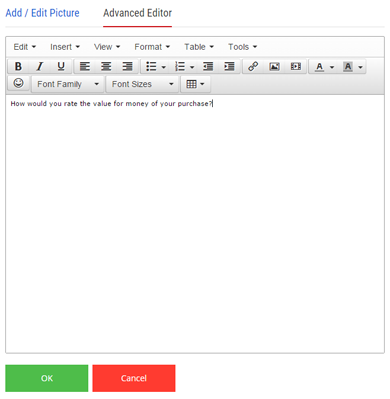
Click the 'Add Picture' icon to the left of every question or answer text box, then in the dialog that appears click 'Advanced Editor' at the top of the window. Questions or Answers that have advanced content will appear blue in the editor and you can click them to edit them again.
Add Videos or Custom Pictures
Click 'Insert' in the toolbar and then select 'Insert Video' or 'Insert Image'. Then add your video or image details in the dialog and click 'ok', and then 'ok' again on the 'Advanced Editor'.
For video, the easiest way is to host your video on a free service first such as YouTube and then insert the 'Embed' code that they give you into the 'Embed' tab of the 'Insert Video' dialog.
Add Sound
You can add sound in the same way that you add video. First you can host your sound on a free service such as SoundCloud and then once you have obtained the embed code that they give you, you can insert it into the 'Embed' tab of the 'Insert Video' dialog.
Add a Link
Click 'Insert' in the toolbar and then select 'Insert Link'. Enter your link details and then click 'ok'
Advanced Features and HTML
By clicking 'Advanced Editor' at the top, you can also use the same dialog to add tables, text formatting and colors. From the 'Tools' menu you can select 'Source Code' to add HTML and CSS directly.
Question Types
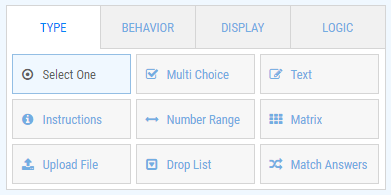
The Question Types effect the way your questions appear and behave, click the 'More..' button under 'Type' to see all available Question Types
Select One
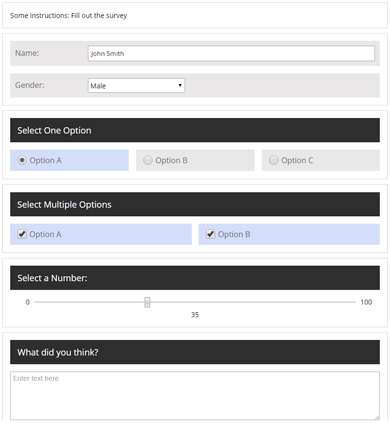
Use the 'Select One' question type to give your respondents only one choice from a list of possible choices
Multi Choice
Use the 'Multi Choice' question type to allow your respondents to choose one or more options from the list of possible choices. You can also limit how few or how many choices they can choose from the Behavior section.
Text
Use the 'Text' question type to allow your respondents to type an answer, these can be single line (eg: 'Name' or Email') or multi line open ended questions - change this from the Behavior section. You can also make the entire question only span 1 line from the Display section, and force a format such as email or number from the Behavior section.
Number Range
Use the 'Number Range' question type so that respondents can easily select a number along a sliding scale. You can set the minimum and maximum number from the behavior tab.
Drop List
Click the 'More...' button to see this question type. This is the same as the 'Select One' question type in that you can only choose one option, however the list is presented as a drop down list where they have to click the arrow to see the full list. It is useful for questions with a large list of possible answers (eg: Country)
Instructions
Click the 'More...' button to see this question type. The 'Instruction' type allows you to add more information to your quiz. You can also use this type to add an introduction page to your quiz by having an 'Instruction' question as your first question.
Match Answers
Click the 'More...' button to see this question type. The 'Match Answers' type allows you to enter a list of questions and the answer for each one. Then during the quiz the respondent is shown all the answers for each question and must select the correct one to continue. As they complete each question the correct answers are greyed out until they are all matched. For a scored quiz each match question starts with a score of 3 (this can be changed) and they will lose a point for each incorrect guess.
Upload File
Click the 'More...' button to see this question type. You can use this question type to allow respondents to upload one or more images, documents or other types of files. Use the setttings on the behavior tab to set the allowed file types and a minimum or maximum amount of files.
Question Behavior
These options change the way your question will act in the quiz - they are slightly different options for each Question Type
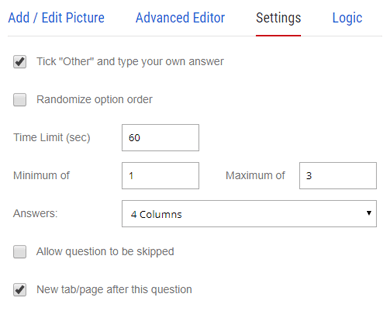
Allow question to be skipped
Your respondent doesn't have to answer this question and will not be prompted if they ignore it.
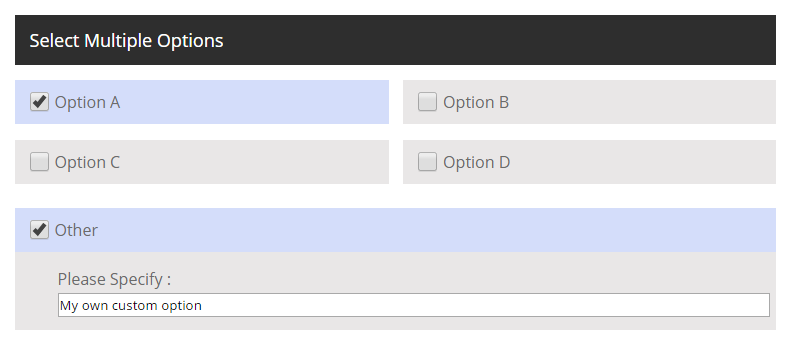
Tick 'other' and type your own answer
Respondents can tick an option labeled 'Other' and type in their own answer. You can change the text of the 'Other' option from the Translate section, either to a different language or just to your own custom text.
Randomize option order
This will mean that the order on the page of your answers to this question will be different for each respondent. Use it to ensure there is no bias in your answers due to the position of the answers.
Select Minimum/Maximum of
Enter numbers in the boxes to force your respondents to select a minimum or maximum of different answers to a multi choice question. Leave either box blank to have no minimum and/or maximum.
Set a Time Limit for answering
To set a time limit for a question enter a number (in seconds - eg: to move to the next question after 2 minutes enter 120). The time limit will apply and can not be avoided by changing the system time or refreshing the page.
Allow multiple lines in answer
For Text Questions you can allow respondents to enter multiple lines of text (and give them a bigger text area) by ticking 'Allow multiple lines in answer'.
Text Format
For Text Questions you can force respondents to answer using a specific format such as an email address, number or website address. You can also set your own custom format using regular expressions.
Question Display
Change the way your question displays in the quiz.
Answer Columns
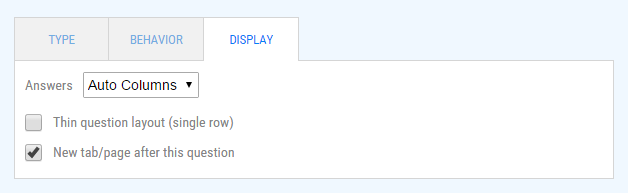
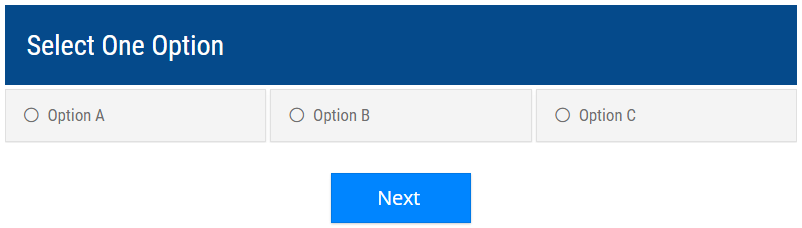
Have your answers in from 1 to 5 columns across the page - or select 'Auto Columns' and they will be organized in the best layout based on their size.
New tab/page after this question
A 'Next' button will display after the question, or if Auto Advance is selected, then the next question will automatically show as soon as this question is answered. Untick this question if you want multiple questions to appear below each other on the same page. You can also change this option for all questions on the Settings Tab. If a question has a new page after it then the bottom border will be solid in the Quiz Editor, otherwise it will be dashed.
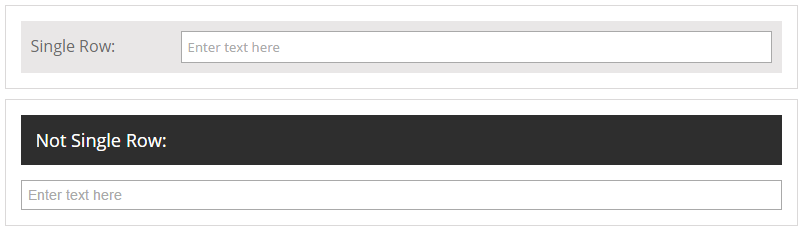
Thin question layout (single row)
For 'Text' or 'Drop List' questions you can set this so that the question display in your quiz is streamlined into a single row instead of a big block, it is especially good for single line answers such as 'Name', 'Email' or 'Gender'
Question Logic
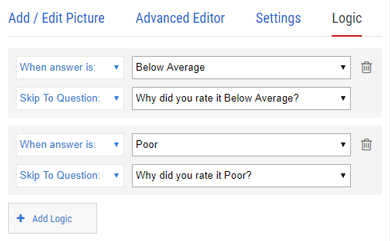
Use Question Logic to change which questions your respondents see based on earlier answers. For example if they answered that they did like your product you would hide a question asking what they did not like about your product.
Please Note: You will need to make sure there is a new tab/page between the question with logic and the question it is hiding or skiping to.
Conditions
- When answer is: This means that the logic will only happen when the answer to the current question is the answer you specify in the dropdown list to the right of 'When answer is:'
- Always: If you click 'When answer is' and select 'Always' instead, then the action that you select will always happen regardless of the answer the recipient chooses.
-
Randomly:
If you click 'When answer is' and select 'Randomly' instead then when the recipient chooses their answer to this question, the quiz will randomly select one of the logic actions that you have set as 'Randomly'.
So for example, if you only set one logic action as 'Randomly' then it will happen every time. However if you add 4 logic actions as 'Randomly' (to a single question) then each action will happen 25% of the time.
If you wish for one action to happen more frequently you can add it multiple times, so for example if you add 'Randomly Skip to Question 2' once and 'Randomly Skip to Question 3' 3 times then 'Randomly Skip to Question 3' will happen 75% of the time.
-
Is Question Num:
This option will make your logic happen if the respondent has answered the number of questions you indicate in the number input to the right.
For example: if you have 20 questions and only wish your respondents to answer 5 of them - you can set 'Is Question Num' to 5 for each question (with an action of 'End Quiz') and then set your question order to random and your respondents will answer 5 random questions from your group of 20.
Actions
- Skip to Question: When the conditions are met for this logic, the next question will be the selected 'skip to' question and all questions in between will not be answered.
- Hide Question: When the conditions are met for this logic, the question you have selected will not appear in their quiz. The question you select has to be after the question with the logic.
- End Quiz: When the conditions are met for this logic, the quiz will immediately end after this question and they will be shown their results, all remaining questions will be skipped.
Adding Answers
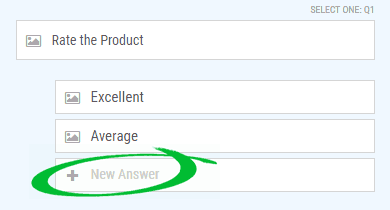
Click inside a Question text box to select the question and the question will expand to show a blue 'Add Answer' link under the answers. Click this to add a new answer. You can safely Add or Reorder questions after your quiz has received responses without effecting previous responses.
Reorder Answers
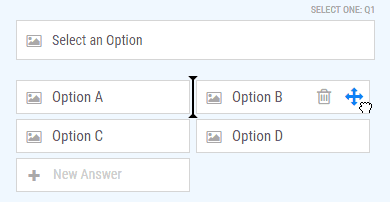
Hold the mouse button down over the 4 pronged arrow (or your finger on a mobile/ipad) and drag your answer to where you want it to be in the list. A black line will appear showing you where the answer will move to once you let go of the mouse button (or remove your finger from the screen).
Delete an Answer
Click in an answer to select it, then click the grey 'X' to the right of the text box to delete that answer. You can delete answers after receiving responses, however any respondents who have answered with that answer will now have a blank answer (or that answer will be removed in the case of multi choice).
Import Answers
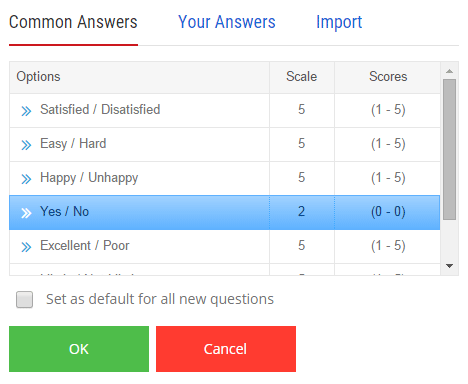
Under your answers for each question is a blue 'Import Answers' link that allows you to easily add answers that you do not wish to type out manually. This will open a dialog with three options along the top: 'Common Answers', 'Your Answers' and 'Import Answers'.
Adding Common Answers
'Common Answers' will give you a list of answers that many of our users have found handy to easily add. Click on a row to see a full list of the answers and scores (if applicable). Once you have selected the answer group that you want, click 'OK' to replace your answers for that question.
Copying Existing Answers
Selecting 'Your Answers' gives you a list of all the groups of answers available in your quiz - this is handy if you are using the same group of answers for multiple questions in the quiz.
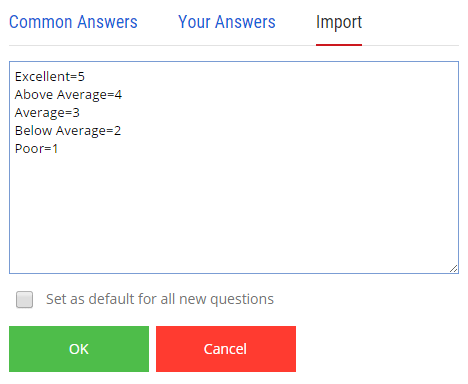
Importing Answers from Text
Select 'Import Answers' if you have a big list of answers as text that you don't wish to type out manually (eg; Country). Just paste the answers in the box provided with each answer on a new line and then click 'OK' to change the answers for that question to your list. If you wish to add scores at the same time you can do so by putting =N after each answer on the same line, with N being the score number (eg: Excellent=5)
Default Answers
If you need to add the same answers to multiple questions then you don't need to type them out each time. You can use the Import Answers section to set any list of answers as the default for new questions and then when you add a new question your answers will already be there.
Setting your Answers as the default
- Add a question and then type the answers you want to use as default answers
- Click the 'Import Answers' link under your answers
- Select 'Your Answers' from the top of the dialog that opens up
- Select the answers you just added from the 'Your Answers' list
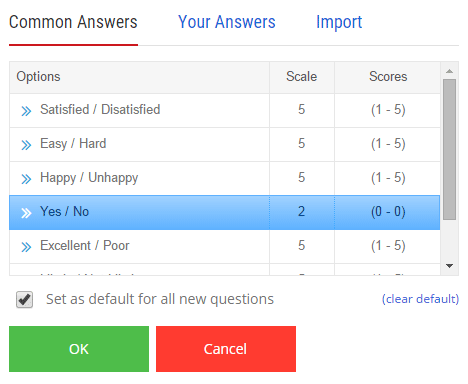
- Tick 'Set as default for all new questions' and click 'OK'
- New questions will now have your answers already added.
Clearing the default answers
- Click the 'Import Answers' link under any question
- There will be a blue 'clear defaults' link To the right of the tick box 'Set as default for all new questions'
- Click the 'clear defaults' link and click 'OK'
- New questions will now no longer have default answers
Using Previous Answers
You can use answers the respondent has already entered or selected in later questions or answers in your quiz. For example you could ask a respondent to enter their name (eg: 'John') as the first question and then the text for the second question could be: "Thanks John, please answer the following:"
Inserting the Previous Answers
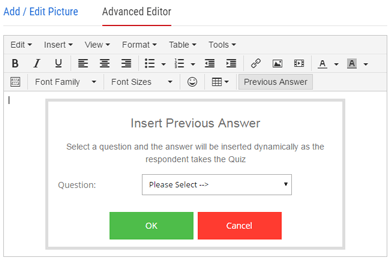
To add previous answers you first need to go into the 'Advanced Editor'. Click the picture icon to the left of a question or answer and then click 'Advanced Editor' at the top of the Dialog.
From the 'Advanced Editor' toolbar click 'Previous Answer' and then select your question and press 'OK' to insert the answer to that question.
Preview your Quiz
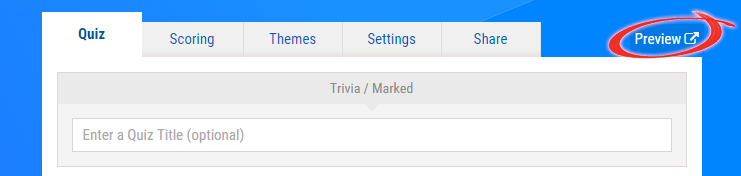
In the top right of the Quiz Maker is a button to preview your quiz. You can press this button at any time to see how your quiz currently looks, it will open in a new window and there is no need to save your quiz first.
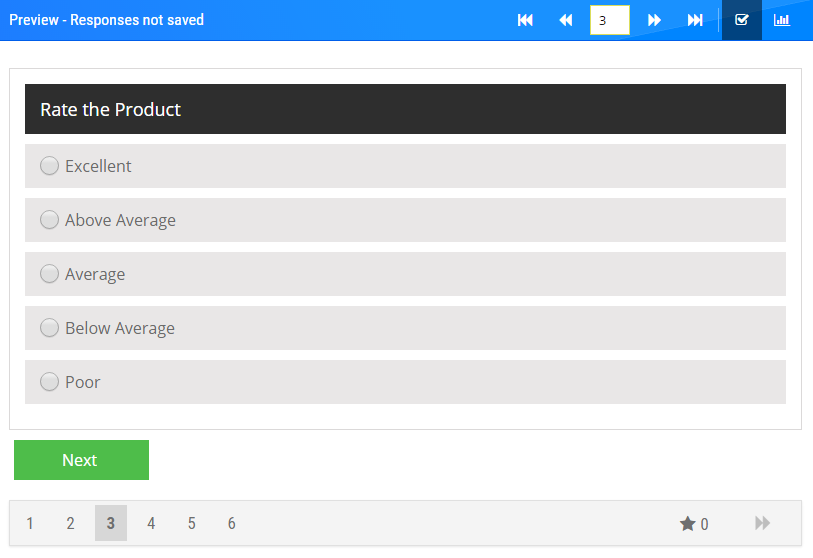
Live Preview
The preview window that opens will show exactly what your final quiz will look like, you can answer any of the questions or test the question logic and the responses will not be recorded or effect your results. Use the arrows in the blue bar at the top to move between your pages, or type a page number in the text box.
Preview your Quiz Results
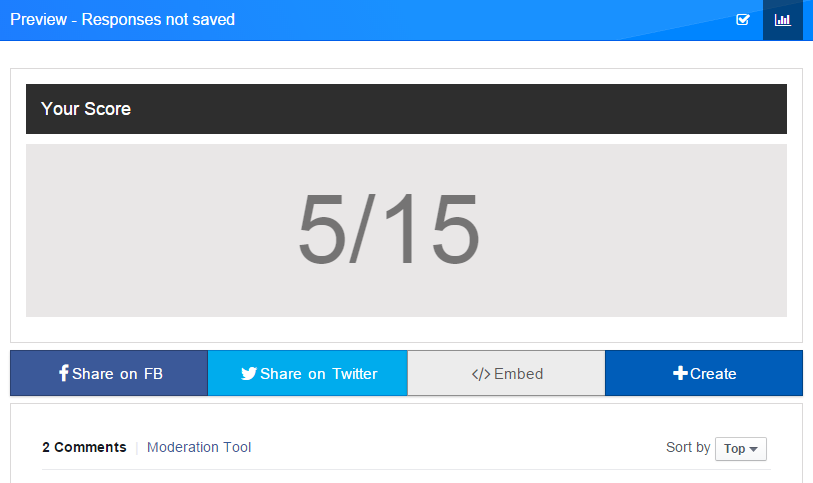
After you have opened your preview window with the preview button, you can click the 'Results' button in the far right of the blue preview bar at the top. This will show the results page of the last response you have entered into the preview (eg: a Score for Trivia or one of your Outcomes for a Personality Type quiz).
Please Note:The results in the preview window are a preview only and will not reflect any results the actual quiz has already collected.
Reseting your Quiz
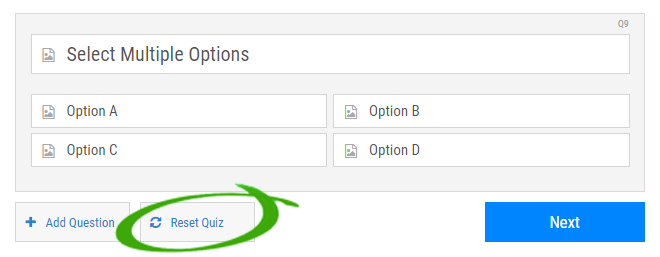
If you have not saved your quiz yet, then at the very bottom of the Quiz Maker you will find a button on the left labeled 'Reset Quiz'. This button will completely clear the Quiz Editor and reload the page so that you can start creating a quiz from scratch.
The button will not appear if you have already saved the quiz at least once - if you wish to clear the quiz editor after you have saved the quiz you can just refresh the page (unless you are editing an existing quiz from within your account, in which case you can click 'New Quiz' in the top toolbar).
Making an Outcome Quiz
Select the 'Personality / Type' Quiz Type or Select 'Outcomes' on the Results tab to make an Outcome based quiz.
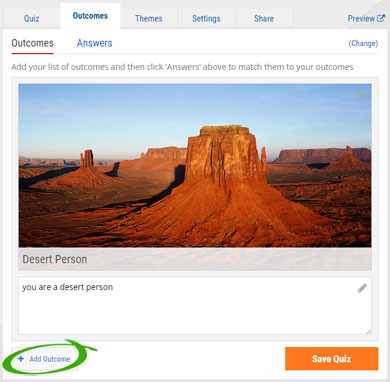
Add a new Outcome
- When you have made your quiz an Outcome based quiz, the second tab of the Quiz Maker will be labeled 'Outcomes'.
- Select this tab and then select 'Outcomes' at the top of the tab to show your outcomes
- Click 'Add Outcome' at the bottom of the tab to add a new outcome, you can have as many as you like.
- Fill in the text box given and you can optionally add a picture with the 'Add Picture' icon to the left of the text box.
- For Advanced Content such as Videos, Links or extra images you can click the 'Advanced Editor' icon in the top right of the text box.
Custom Outcome Message
You can make your own custom outcome messages using special notation to dynamically insert the outcome details into the Custom Thankyou message. Use {outcome} to insert the name - you can also use {outcome description}, {outcome picture} and {outcome match} (for the percentage Match to the outcomes based on their answers)
Match Answers to Outcomes
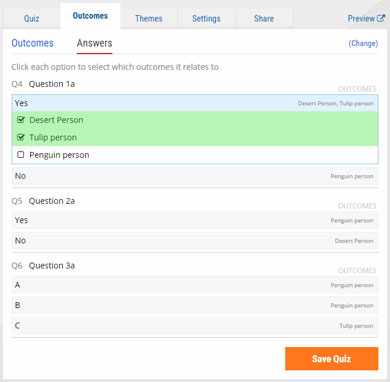
After you have Added your Outcomes you can start matching your quiz answers to the Outcomes that they will cause.
- Select the second tab of the Quiz Maker which should be labeled 'Outcomes'
- Click 'Answers' at the top of tab
- For each of your Single Choice, Multi Choice or Drop List questions there will be a list of the answers you have added
- Click on each answer and a box will show with all your outcomes
- Click each outcome that applies to that answer and then continue on to the next answer. You can select multiple outcomes per answer if you need to.
- You can see what outcomes you have selected to the far right of each answer row
Making a Scored Quiz
Select the 'Trivia / Marked' Quiz Type or Select 'Scored' on the Results tab to make a Scored quiz or Online Test.
Scoring your Quiz
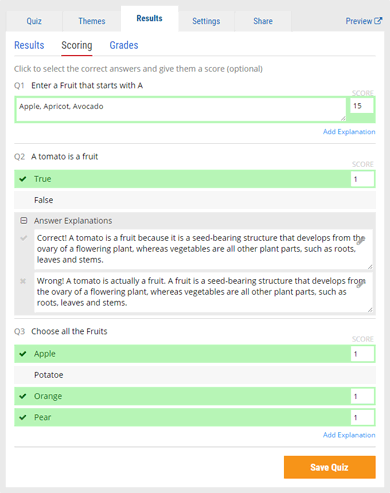
- When you have made your quiz a Scored quiz, the second tab of the Quiz Maker will be labeled 'Scoring'.
- Click 'Scored' at the top of the Scoring tab.
- For each of your Single Choice, Multi Choice or Drop List questions there will be a list of the answers you have added. For Text questions there will be an empty text box.
- Click on the answer that is correct for each question, it will turn green with a green arrow to the left and a box will appear to the right where you can enter a Score for that question - it will default to 1.
Scoring a Text Question
For a Text question, you can enter as many possible answers as you like separated by a comma (,). You can also use the wild card characters star * and underscore _ to match your answer more easily.
The star * will match any group of text, for example: If the correct answer is Bob you can use *bob to mark my name is bob as correct, but bobby would be incorrect.
The underscore _ will match a single character, for example: If the correct answer is fun or fan you can use f_n to mark both as correct, but flan would be incorrect.
Explaining your Answers
For answer explanations to work you must first select the 'Trivia / Marked' Quiz Type or Select 'Scored' on the Results tab to make a Scored quiz or Online Test.
Adding Explanations
- When you have made your quiz a Scored quiz, the second tab of the Quiz Maker will be labeled 'Scoring'.
- Click 'Scored' at the top of the Scoring tab.
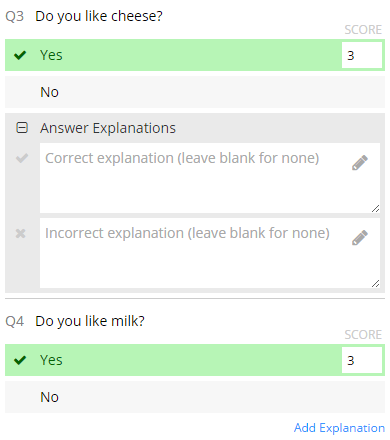
- For each of your Single Choice, Multi Choice or Drop List questions there will be a list of the answers you have added or a text box. Underneath and to the right of each question is a blue link labeled 'Add Explanation'.
- Click 'Add Explanation' to drop down the explanation text boxes
- Fill out an explanation for a correct and/or incorrect answer - click the 'pencil' icon to open the 'Advanced Editor' and insert previous answers to your quiz for extra personalization.
Making a Graded Quiz
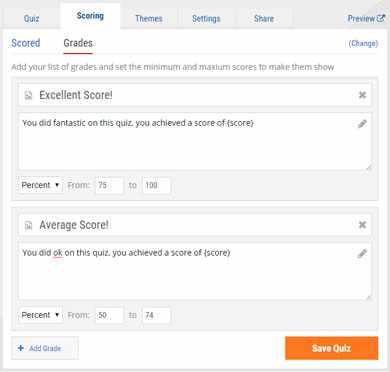
The 'Grades' feature enables you to show your respondent a different result based on the score that they get.
For Example: If you add the Grade 'Excellent' with the score Range of 70% to 100% then if your respondent scores 8 out of 10 (80%) they will be shown the 'Excellent' grade at the end of the test.
Adding Grades
- When you have made your quiz a Scored Quiz, the second tab of the Quiz Maker will be labeled 'Scoring'.
- Click 'Grades' at the top of the Scoring tab.
- Click 'Add Grades' at the bottom of the tab to add a new Grade.
- Give your grade a name and description and (optionally) a picture using the 'Add Picture' icon to the left.
- To add Video, Links or more Images You can use the icon in the top right of the description box.
- Under the grade description you can select 'Scores' or 'Percent'. Scores will match the grade to their raw score, and 'Percent' will match the grade to their percent score (their score divided by the maximum possible score).
- Enter a range of scores in the From and To boxes - the range is inclusive meaning it will match the number in the 'From' box and the 'To' box and anything in between.
- If your ranges overlap it will select the first grade in the list that matches their score.
Deleting Grades
Use the 'X' button to the right of the Grade Name to delete a Grade
Showing the Final Score or Percent
In any of the Grade name or description boxes you can use the notation {score} to dynamically insert the respondents final score, {percent} to insert their Percent Score and {max score} to insert the maximum possible score. You can also do this (and more) in the Custom Thankyou message - the other options are {grade}, {grade description} and {grade picture}.
Changing your Result Type
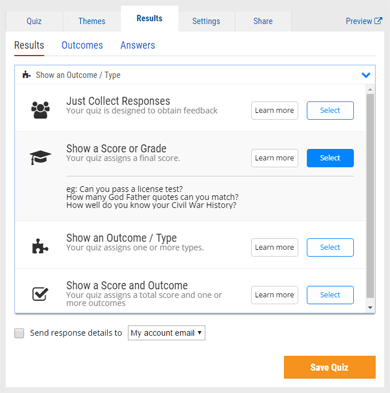
If you select the 'Survey / Blank' Quiz Type or if you wish to change your result between Scored and Outcome you can do so from the second tab.
If you have not already selected a type of result then the second tab will say 'Results' and will display buttons to select the result type.
If the second tab already says 'Outcomes' or 'Scoring' you can use the blue '(Change)' link in the top right of the tab to show the buttons that will let you select the type
Adding a Dynamic PDF File
If you wish to add a certificate, diploma or other downloadable file into your quiz you can use the Dynamic PDF function to create and add PDF's in to your quiz results that will be unique for each respondent. You can also download these files yourself individually or in a combined zip file from the 'Manage Files' section of your account.
Where you can insert Dynamic PDF's
You can insert Dynamic PDF's in the following locations:
- The Custom Thankyou message in the 'Results' section of the Settings tab.
- Any Grade Description using the 'Advanced Editor'
- Any Outcome Description using the 'Advanced Editor'
- Emails sent through the Integrate section.
How to Create & Insert a Dynamic PDF
- Open the 'Advanced Editor' for any of the previously mentioned locations
- Click 'Dynamic PDF' from the toolbar
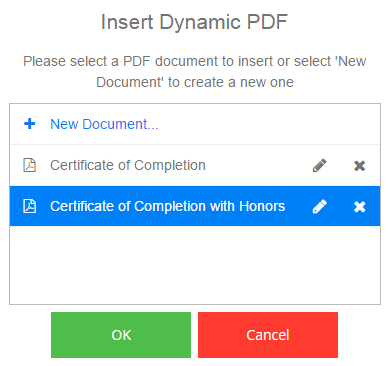
- If you have already created Dynamic PDF's a list will come up in a dialog
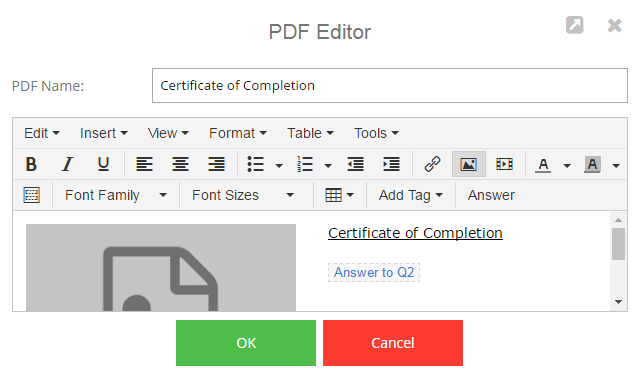
- If you haven't created a PDF the 'Edit PDF' dialog will appear.
- Use the 'Edit PDF' dialog to create your document, you can click 'Add Tag' or 'Answer' to insert details from the quiz.
- Click 'OK' from the 'Edit PDF' dialog or select your document name from the list and click 'OK' to insert
Selecting a Theme
Use the third 'Themes' tab to change the look of your Quiz, you can select from a large range of different themes, or start with one of ours and customize it to suit your website.
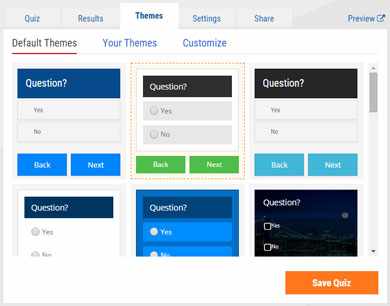
Default Themes
This is where you will find all our themes, scroll down to see them all and select the one you like by clicking on it (it will highlight in yellow with an orange dotted border). Some of the themes have background images - you can select a Theme with a background image and then click Customize to go to the Customize section and change the background image.
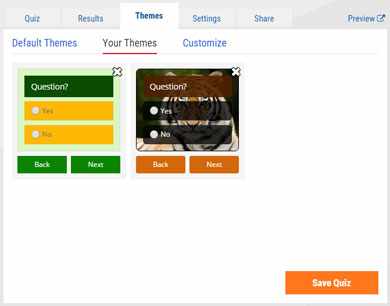
Your Themes
If you have customized a theme and saved it then it will appear in this section, you can select themes here by clicking on them - you can also go to the Customize section to change them further.
Customize your Theme
Once you have selected a theme from the 'Default Themes' or 'Your Themes' you can click 'Customize' up the top to make any changes you like to that theme.
How to Customize
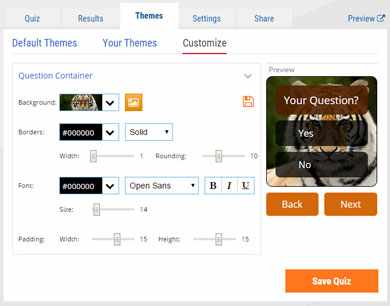
The customizer is split up into different sections for each part of the quiz, you can change between sections (see below) and then modify every aspect of those sections including Background Colour, Picture & Gradients, Borders, Fonts, Font Styles and Padding/Margins.
Customize each Section
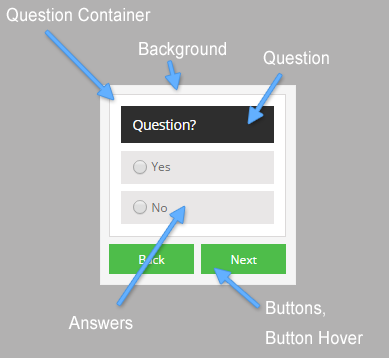
At the top of the customize section is a blue title that indicates the part of the theme you are currently working on. Click on it to change the section, or hover over the preview and click to directly select the section under the mouse pointer.
- Question Container: The box for each question that wraps around the questions and answers
- Question: The text of the question itself and it's background
- Answers: Each of the individual answers and their background
- Buttons: The 'Back' and 'Next' buttons at the bottom of the page
- Button Hover: Styles for when you hover over the 'Back' and 'Next' buttons
- Results: For Quizzes with result reports at the end these are the colours and styles of the bar charts - the preview will change when you select this section
- Text Field: For text based answers these are the styles for the Text box/area
- Background: This is the background and styles for the entire page - use it to add a background picture
- Answer Selected: The style when an individual answer has been selected
- Answer Hover: The style when you hover your mouse over an individual answer
Adding a background color or picture
Use the Customize section of the Quiz Maker to add a background color, gradient and/or image to your Quiz. If you wish to add a different picture to each question it is better to add the picture directly to the question on the 'Quiz' tab.
Adding your Backgound
- Go to the 'Themes' tab of the Quiz Maker
- Select a Theme from the 'Default Themes' or 'Your Themes' and then click Customize at the top
- Click on the blue text at the top and change it from 'Question Container' to 'Background' if it isn't already on 'Background' - if you don't want the picture to span the whole page and just be behind the question you could instead add your background to the 'Quiz Container'.
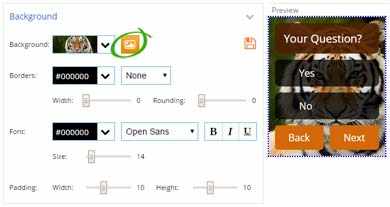
- Next to line that says 'Background' is a box with a drop down arrow and a button with a picture on it.
- Click the arrow to add a single colour and in the box that drops down select the saturation on the left and the hue on the right then click the arrow again to hide the box. You should see the color change live in the preview
Please Note: If the 'Question Container' has a background color as well then you might only see a bit of the background color because it will be hidden by the 'Question Container', see the next section on how to remove the background from the 'Question Container' if you need to. - To add a Background Picture click the button to the right of the arrow with the photo icon
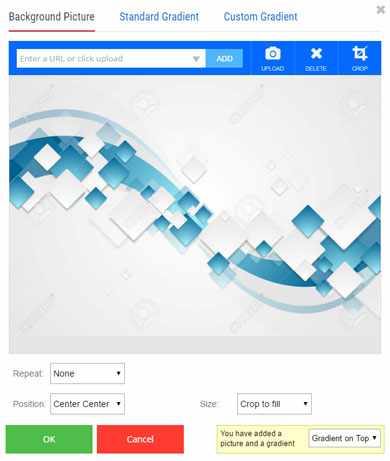
- In the window that opens click the 'Upload' button to add a photo from your computer or type a URL and click 'Add' to add from the web. See the Add Pictures section for more instructions.
- Underneath the Photo preview are some options for the display of the background, they are further explained below.
- You can optionally add your own gradient to go over the top or underneath the picture (explained below).
Background Picture Options
There are 3 options that can change how your background appears
- Repeat: If your background doesn't fill the entire area this sets if the image will repeat or just stop. ('Both' Recommended)
- Position: This sets where your background will sit on the page, eg: Left Top will start the background at the very top left corner of the page ('Center Center' Recommended)
- Size: This will set how big your background is on the page, 'Crop to fill' is best because it will make the picture fill up the entire page and only crop any bits that don't fit on the page ('Crop to fill' Recommended)
Adding a Gradient
- click the Background Picture button to the right of the arrow with the photo icon
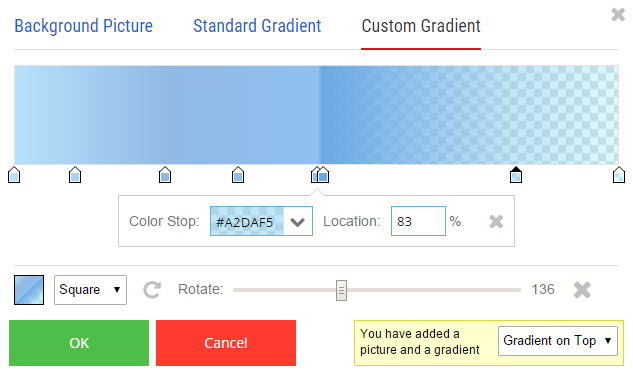
- At the top of the window select 'Standard Gradient' for a default one, or 'Custom Gradient' to make your own
- for a 'Custom Gradient' click on the small colored arrows underneath the gradient preview then change their color directly below next to 'Color Stop:'
- You can drag the arrows to move their position and it will change where that color starts. Click anywhere in the zone directly below the gradient preview to add a new 'color stop' at that position. The mouse pointer will show a as you hover.
Removing the 'Question Container' Background
If your 'Question Container' also has a background you may wish to remove it so that you can see the page background through the question.
- Click on the blue text at the top and select 'Question Container' from the list
- If the picture button is orange, click it and then click the delete cross to remove the photo and click 'OK'
- Click the drop down arrow across from background and slide the slider next to the 'a' (Alpha Transparency) down to zero to set it to transparent
- Alternatively just delete the text from the box and type 'Enter'
Saving your Theme
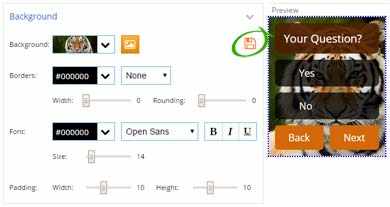
You can save your custom theme into the 'Your Themes' tab for use in other Quizzes. From the Customize section change the Theme to how you want it and then click the save icon and give your theme a name and click 'Save' to save your custom theme. The save icon will be orange if you have made changes that you haven't saved.
Deleting one of your Themes
If you no longer need a theme you can delete it from the 'Your Themes' tab by clicking the cross icon in the top right of the theme.
Changing Quiz Settings
The 'Settings' tab allows you to change exactly how your quiz and results are displayed and behave, it is split into Quiz settings, Results settings, Lead Capture settings and Advanced settings.

Adding Page Breaks
By default each of your questions will display individually and advance to the next question after you answer the previous one.
Setting Automatically
On the Settings tab change the drop down list labeled 'Page Breaks after every Question' to from 1 to 5 questions and your questions will automatically be grouped into the number you pick. New questions that are added will also be kept in these groupings, however if you add new questions in between other questions you may have to change this drop down back to 1 Question and then to your chosen amount to reset the groups.
Setting Custom Breaks
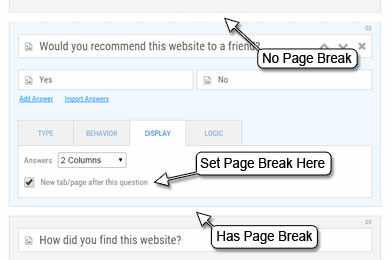
You can also change the question groupings manually on the Display section of the question by ticking/unticking 'New tab/page after this question'
How it looks
In the editor you can tell a question has a break after it if the bottom border is solid - if two questions are grouped together they will both have dashed borders (below the first question and above the second).
Randomize Question Order
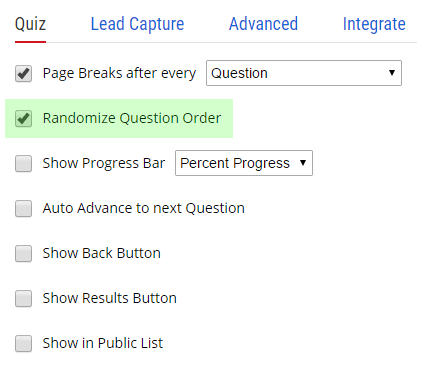
To improve the accuracy of your results, or just to make a quiz more interesting you can make the questions appear in a random order every time the quiz is loaded. Tick 'Randomize Question Order' from the 'Quiz' section of the Settings tab
Keeping instructions at the start
If you wish to have instructions or questions at the start of the quiz that are not randomized then you can change the drop down list after the 'Randomize question order' from 'for entire quiz' to 'after page 1' or after a custom page and then the questions on those pages will not be randomized and will always stay at the start.
Grouping Questions together
The randomize option actually randomizes based on the Page Breaks and not individual questions. This means that if you group multiple questions together on one page they will always stay together (eg: an 'Instruction' question and the actual question it belongs to.)
Limitations
It is not recommended that you use Question Logic with randomized question order as it can invalidate the logic, if you do choose to use these features together, it is recommended to use the Quiz Preview to test extensively that you are achieving the result you are after.
Adding a Progress Bar
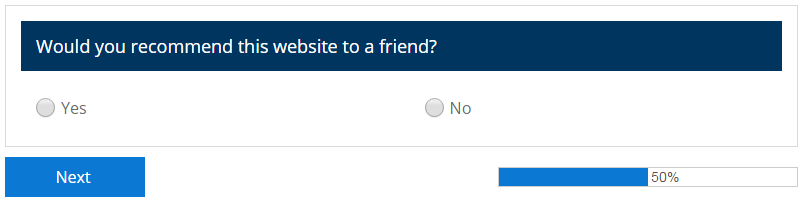
From the Settings tab of the Quiz Maker you can add two different types of progress bars to show your respondents how far along the quiz they are. Tick 'Show Progress Bar' to add the progress bar and then change the drop down to either 'Percent Progress' or 'Numbered Pages'.
Percent Progress Bar
The percent progress bar shows how far along you are in the quiz based on the completed percentage of questions - it is calculated on total numbers of questions and is not effected by Page Breaks or Question Logic.
Numbered Progress Bar
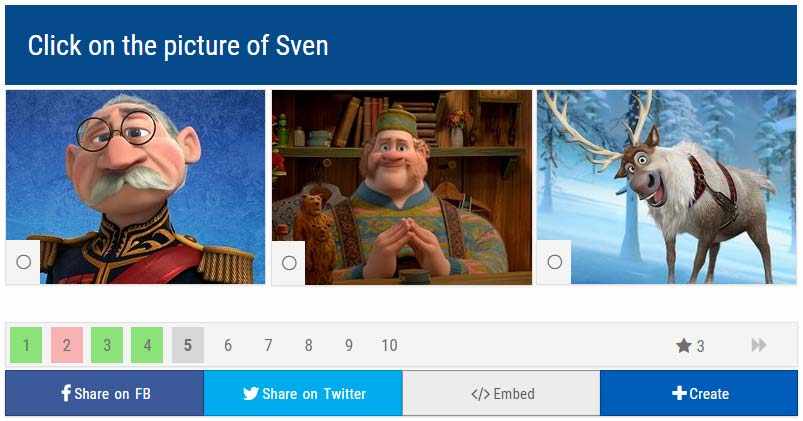
The numbered progress bar shows what page of the quiz you are up to and is based on the Page Breaks and not individual questions (they are the same by default however).
Scored Progress Bar
If you use the Numbered Progress Bar and have a Scored Quiz with Scoring as you go (such as a Trivia Quiz), then the progress bar will also highlight green for pages where you have gotten all the questions correct, and red if you haven't. The bar will also display your current score on the right next to the star icon .
Auto Advance to next Question
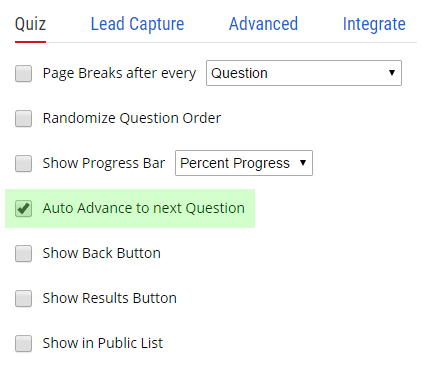
Use 'Auto Advance' so that the next question displays immediately after they have answered the previous question without having to click a 'Next' button. To set 'Auto Advance' tick the box labeled 'Auto Advance to next Question' under 'Quiz' on the Settings tab. This option is set by default on 'Triva / Marked' and 'Personality' Quiz Types but it can easily be unticked if it isn't required.
Limitations of Auto Advance
Only 'Select One' and 'Drop Down' Question Types can be auto advanced as other types (eg: 'Text' or 'Multi Choice') require the respondent to indicate when they are finished responding. Questions that can not be auto advanced will show the 'Next' button under them. In addition if Page Breaks have been customized and there are multiple questions on one page, only the last question on the page will auto advance (if possible) or display the 'Next' button.
Showing/Hiding the back button
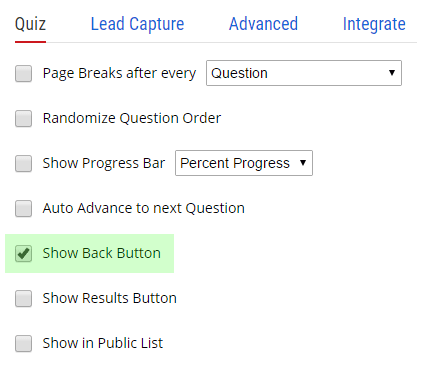
If you don't want to allow respondents to see (or change) their previous answers you can hide the back button from the 'Quiz' section of the Settings tab by unticking 'Show Back Button'.
The back button is hidden by default on the 'Trivia / Marked' and 'Personality' Quiz Types but can be ticked to show again.
Adding your quiz to 'Latest Quizzes'
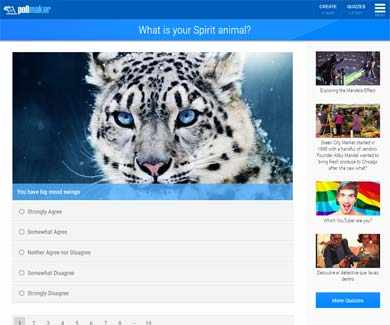
On www.poll-maker.com we have a Latest Quizzes page which shows the most recent and most popular quizzes that have been create with our Quiz Maker. Adding yourself to this list can bring you a whole new audience and you (optionally) use the Custom Thankyou message at the end of the quiz to direct respondents to your website, blog or YouTube account. You can also add in your own #hash tags and @account mentions into the Social Media Settings so that when people share your quiz they are also linking back to you!
How to appear in the list
To appear in the list you need to tick 'Show in Public List' on the 'Quiz' section of the Settings tab, and also add at least one Picture to a question in your quiz. If you don't want a picture in your quiz, or if you want to change your pictures in the Latest Quizzes list you can update the Social Media Settings and add or change the picture there.
Showing a Custom Thankyou Message
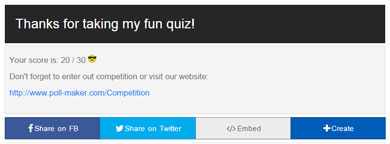
At the end of your quiz you can completely customize what your respondents see. In the 'Results' section of the Settings tab tick the box 'Show custom thankyou message' and click the blue 'Edit Message' to change the message that appears.
Editing the Message
When you click 'Edit Message' the Advanced Editor will appear and you can add in any text, links, images and multimedia/videos that you require. Click 'Insert' in the menu bar at the top to insert a Link, Image or Multimedia. If you know HTML you can also click 'Tools' and then 'Source Code' to enter code manually.
Inserting Quiz Scores
For Scored Quizzes you can also use special tags to insert the respondents results directly into your custom message, for example:
- {score} will be replaced with the respondents total score
- {percent} will be replaced with the respondents score percent out of 100 (eg: Score divided by Total Possible Score)
- {max score} will be replaced with the maximum possible score of your quiz
Inserting Quiz Outcomes
For 'Personality / Type' Quiz Types or any quizzes with Outcomes set, you can insert the outcome details, for example:
- {outcome} will be replaced with the title of the outcome the respondent got based on their answers
- {outcome description} will be replaced with the description of the outcome received
- {outcome picture} will be replaced with the picture of the outcome received
- {outcome match} will be replaced with the percentage match to their outcome based on the total possible closest match
- {outcome score} will be replaced with the actual score of the outcome
- {outcome max score} will be replaced with the maximum possible score for the outcome
Inserting Quiz Grades
For 'Trivia / Marked' Quiz Types or any Scored Quizzes with Grades set, you can insert the outcome details, for example:
- {grade} will be replaced with the title of the grade the respondent got based on their answers
- {grade description} will be replaced with the description of the grade received
- {grade picture} will be replaced with the picture of the grade received
Inserting Other Tags
There are some other tags you can use in any of the places you can add tags
- {restart button} will be replaced with a button that respondents can click to retake the quiz, the button will have the text 'Start Again'.
- {restart button = Your Text} will be replaced with a button for retaking the quiz, replace 'Your Text' with any custom text you want the button to display.
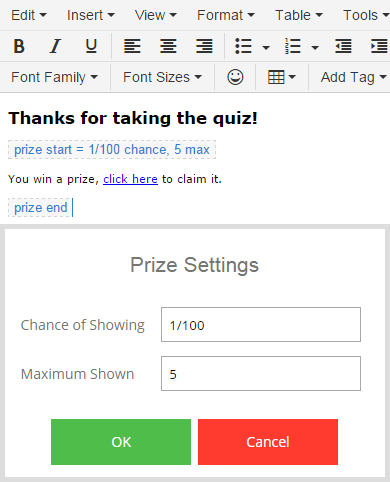
- {prize start = 1/100 chance, 5 max} You Win! {prize end}. You can use the prize start and end tags to give your respondents the chance to win a prize. For more information see Adding Prizes.
Scoring as you go or at the end
By default 'Trivia / Marked' Quiz Types are scored as you go and you can see if you are correct or incorrect immediately after answering each question. However you might want to display the score and/or the results for each question at the end of the quiz instead. You can do this from the 'Results' section of the Settings tab by changing the drop down list after 'Show answer for each Question' from 'during quiz' to 'in results'.
Hide Score for each Question
If you don't want to show the score for every question and just want to give a final score (and/or Grades) you can untick 'Show answer for each question' and just tick 'Show score \ grade in results'
Show Total Score at end of quiz
If you have added Grades to your quiz from the Results tab you can (optionally) untick the 'Show score \ grade in results' and insert the score directly into each grade by adding the text {score} to the Grade Title, Grade Description or Custom thankyou message. See the Custom thankyou message for more tags you can insert automatically (such as maximum score or percent).
The options are greyed out
If the scoring options are greyed out it means you haven't yet set your quiz up as a scored quiz - you can do so by selecting the 'Trivia / Marked' Quiz Type or by clicking the 'Scored' button on the Results tab.
Reporting on all responses
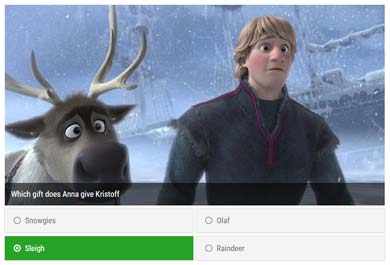
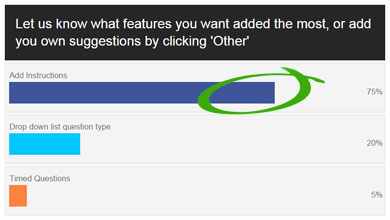
If you want to show your respondents the percentage of people who voted for each option in each question you can tick 'Show report of all responses in results' on the 'Results' section of the Settings tab.
After they have filled out the quiz the respondent will be shown a bar graph of each question showing how many people responded for each answer and the percentages. If you want to hide the values and only show the percentages then you can tick Show percentages only in results
Text Answers
Text Questions that are not Multiple Lines will not show in the public results for privacy reasons (as they are often asking questions like 'Email' or 'Name').
Hiding Social Media Buttons
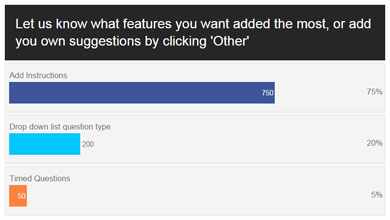
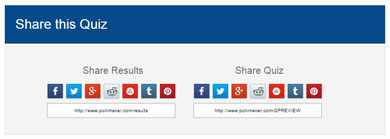
If you don't want social media buttons (such as Facebook, Twitter, etc...) in your Quiz or Quiz Results you can disable them from the Settings tab. 'Trivia / Marked' and 'Personality Type' Quiz Types have a share bar by default as part of the quiz and the quiz results, and other Quiz Types have a Share Tab as part of the Quiz Results only.
Hide the Share Bar from Quiz & Results
Untick 'Show social media bar' from the 'Quiz' section of the Settings tab ('Trivia / Marked' and 'Personality / Type' Quiz Types only).
Hide the Share Tab from Results
Untick 'Show sharing / social media section' from the 'Results' section of the Settings tab ('Survey / Other' and 'Poll / Vote' Quiz Types only).
Can't find the settings
For Quiz Types that don't have these sections the tick boxes will not be visible and the sections will not display.
Hiding the Location Map & Timeline
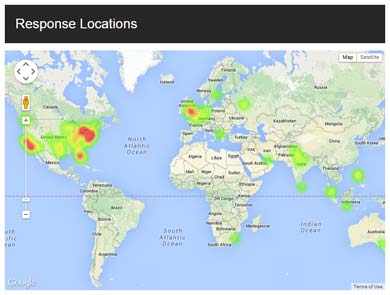
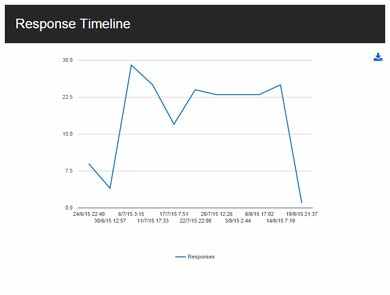
In the public results that appear after you finish the quiz, you can Show or Hide a Location Map and Timeline of all responses from the 'Results' section of the Settings tab - tick/untick 'Show respondent timeline & location map'. If you choose to hide the reports you can still access them from your Account Results by creating an Account.
Location Heat Map
This map shows the intensity of responses from each region of the world. Red indicates a large amount of responses, yellow indicates a moderate amount of responses and green indicates few responses. You can zoom in and out of the map with the vertical drag bar on the left of the map, and you can click and drag to move around the map.
Timeline of Responses
This graph shows the quantity of responses over time - the time scale automatically adjusts based on how long the quiz has been active and 1 point does not always represent 1 day or 1 hour.
Download the Timeline or Map
Click the blue download button in the top right of the Timeline to save it as an image to your local computer (for use in reports etc...). Currently the only way to capture the map is to use a Screen Capture.
Hiding the vote numbers
If you want to report on the results of each question in your quiz, but don't want your respondents to see exactly how many people have responded to each answer or the quiz you can hide the values and just show the percentages by ticking 'Show percentages only in results' from the 'Results' section of the Settings tab.
Receive an email notification after each response
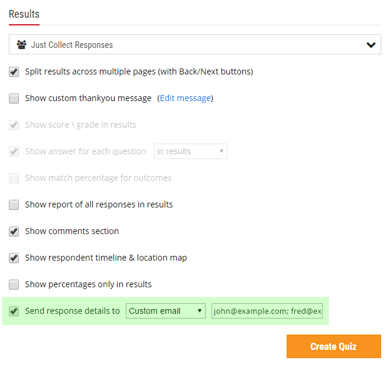
If wish to receive an email notification for each response (with the response answers) you can do so by ticking 'Send response details to my account email' from the 'Results' section of the Settings tab.
You can optionally change the email address that you wish to send to, or send to multiple email addresses by changing the 'My account email' drop down to 'Custom email' and then entering one or more email addresses into the field on the right (separated by the semicolon character, eg: "john@example.com; fred@example.com").
Add a chance to win a prize
You can use the Custom Thank you message or any Outcome or Grade to give your respondents a chance to win a prize.
- From the 'Advanced Editor' use the 'Add Tag' button on the toolbar and select 'Prize Start'
- Type in the text that your winner will see, this can include links to a prize winner page or images etc...
- Use the 'Add Tag' button to add the 'Prize End' tag. Any text within the 'Prize Start' and 'Prize End' tags will only be shown when your respondent wins.
- Click the 'Prize Start' tag to edit the prize options.
- Chance of Showing: This is the chance that the prize text will be shown per respondent. It is counted based on the quantity of people who reach the tag, so for example a tag with 1/100 chance within an outcome will mean that on average 1 out of every 100 people that see that outcome will win.
- Maximum Shown: This allows you to set a maximum amount of times that the prize text will show. For example a value of 5 will mean that once the prize text has been shown 5 times it will no longer show at all.
Asking for an email before results
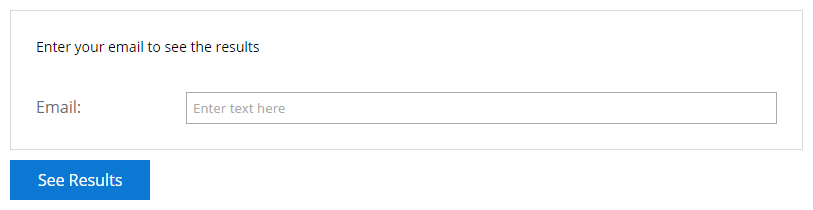
Quizzes can be a great tool to capture leads for your business or website. The idea is to allow respondents to fill out the quiz easily, but then ask them to enter an email before they can access their results (for example a score or personality type).
Adding Lead Capture
At the top of the Settings tab is a blue 'Lead Capture' link - click it to access the 'Lead Capture' section and if you have not already saved your quiz you will be asked to first.
Tick the 'Lead Capture' tick box and save to enable lead capture for your quiz. You can also enable skipping lead capture and change the lead capture questions.
Allow people to skip Lead Capture
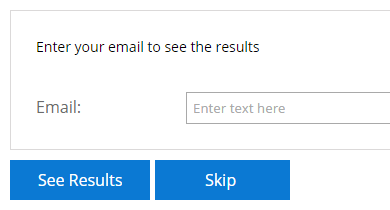
From the Lead Capture section of the Settings tab tick 'Allow respondent to skip lead capture. This will add a 'Skip' button to the Lead Capture form and clicking it will take the respondent directly to their results.
Change the Lead Capture questions
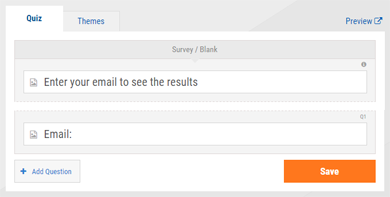
From the Lead Capture section of the Settings tab click 'Edit Lead Capture Questions'. A new window will open (make sure it isn't blocked by any popup blockers you may have active) and you can edit the questions and add more in the same way as you did to make the quiz.
Change the Theme for the Lead Capture Form
After you click 'Edit Lead Capture Questions' you will also see a 'Themes' tab in the new window - you can use this to change what your Lead Capture form looks like.
Setting a Start / End date
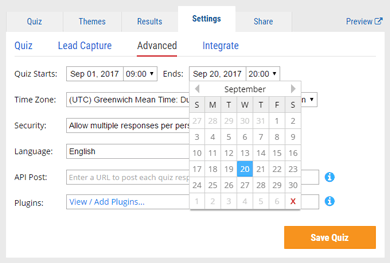
If you set a start and end date for your quiz it will mean that people will only be able to respond to your quiz during the set time frame - outside those dates/times they will be presented with a message either saying the quiz hasn't started yet or has already ended. You can set either the start or end date or both and it will still work.
Set the dates from the 'Advanced' section of the Settings tab by clicking in the box to the right of 'Quiz Starts:' or 'Ends:'. A drop down will appear with a calendar of dates
Using the Calendar
- Click the left and right arrows next to the month to change the month
- To change the year keep clicking the arrows to before January or after December
- Click the date that you want when you have found it
- Click the red X in the bottom right to remove the date completely
Start and End Time
Next to the date box is a drop down list to set the time. It is in 24 hour time so 00:00 represents 12:00 AM in the morning, and 23:30 represents 11:30 PM at night. You can only set the time in half hour increments.
Setting the Timezone
By default the Timezone should be set to your current one, however if it is not or if you need a different timezone you can change it using the drop down list directly below the start and end date boxes. The timezone set here will be applied to the start and end dates and will be the one used in all your reports and exported data.
Blocking people from responding
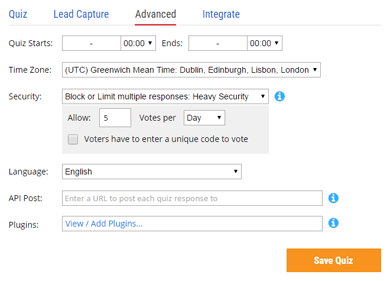
If you need to ensure people only respond a set amount of times you can using the 'Security' settings on the 'Advanced' section of the Settings tab. By default people are allowed to answer a quiz as many times as they like.
Please Note: You can change these settings after a quiz already has responses and it will apply it to previous responses as well - no responses are ever deleted based on changing this setting so you can freely change it and then change it back.
Allow multiple responses per person
All responses are reported on regardless of if the person has answered previously or not.
Block or Limit multiple responses
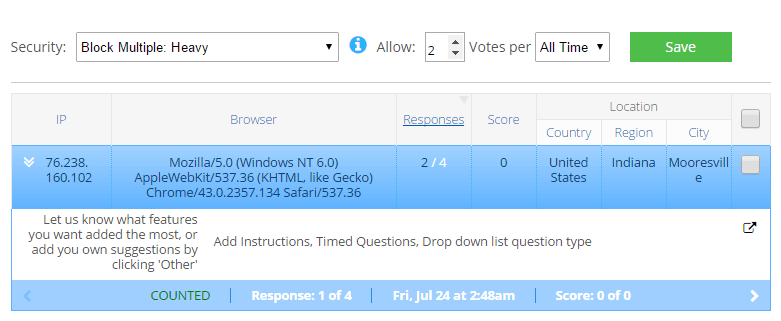
If a person answers multiple times their extra responses will be filtered from the reports and data exports.
- Light Security: The minimum amount of responses are blocked and there is no chance that a valid response will be blocked
- Heavy Security: The vast majority of invalid responses are blocked and there is a (very low) chance that a tiny amount of valid responses will be blocked
- by IP Address: Responses are blocked based on the respondents IP Address - it is not recommended to use this setting unless you understand what an IP Address is and how multiple users can possibly have the same one.
Allow multiple votes per Hour/Day etc...
After you select 'Block or Limit' multiple responses a box will appear underneath allowing you to set how many votes you want and by what time period (eg: Allow 5 votes per day).
How does it work?
We use very sophisticated tools to determine the likelihood of two responses originating from the same person, including Encrypted Validation, Fingerprinting, VPN & Proxy detection, DNS Leak detection, IP Matching, Timed Pattern Matching, and Heuristic algorithms.
Can I remove responses
If you want to also remove responses manually you can from the Responses section in your Account.
Translating your quiz
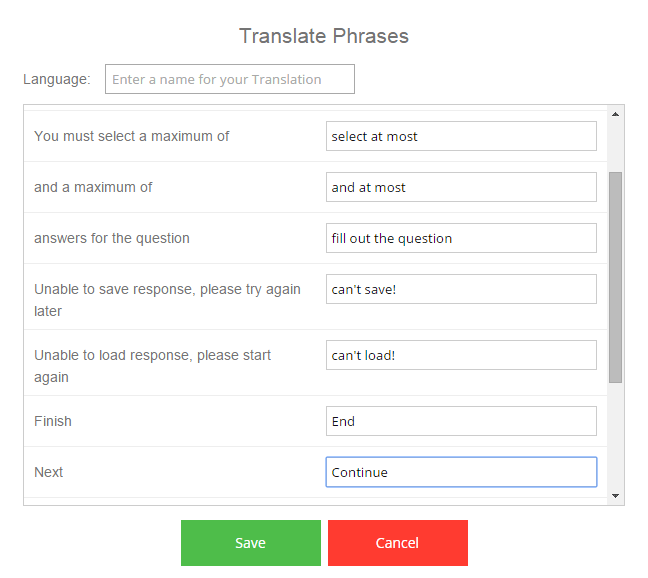
If your quiz is not in English you can use this setting to translate the buttons and messages in your quiz into your own language. From the 'Advanced' section of the Settings tab change the 'Language' drop down from 'English' to your language if it is available or 'Custom' if you wish to add your own translations.
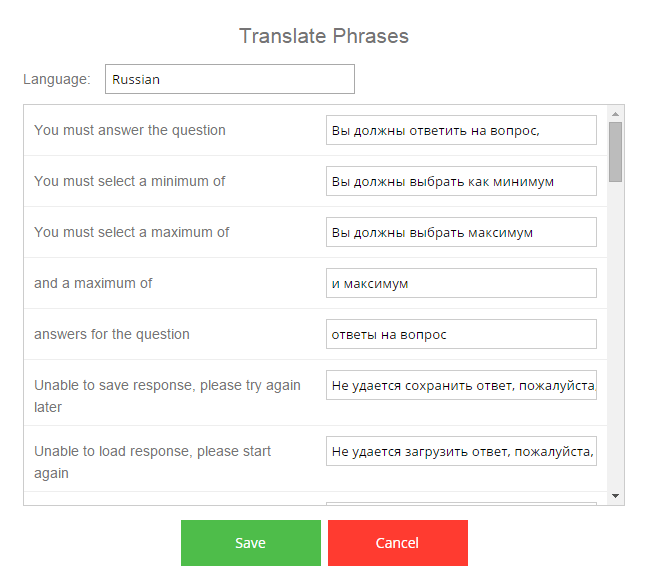
After you have changed the language (or selected 'Custom') a blue 'Edit Translations' will appear next to the drop down list - click it to open a window where you can modify the translations.
The default languages are machine translated so it is worth checking that they suit your audience before proceeding.
Edit Translations
After clicking 'Edit Translations' you will see a new dialog. On the left are all the phrases that could appear in your quiz either as part of a button text (eg: 'Next') or as an error message (eg: 'You must answer the question') or in the results (eg: 'Thanks for taking the quiz!'). On the right are text boxes where you can enter the translations in whatever language you like.
Customizing buttons and error messages
If you want to change the text on a button, error message or in the results you can use the Translate function even if your new text is still in English.
Follow the instructions to change the language but set 'Custom' instead of a new language, then click 'Edit Translations' and change the text in the text boxes on the right to what you want it to say.
Post Quiz Responses to a custom URL
From the 'Advanced' section of the Settings tab you can add a URL to post every response to. Each response will be posted to your URL within 1 - 5 minutes of the respondent finishing the quiz. If you receive multiple responses within minutes of each other then they will be posted in batches every 1-5 minutes - this is to protect your server from being overloaded with large bursts of traffic.
Post Format
The response data will be posted to your URL as FORM data with the name json in the standard JSON Format as below. Each post to your URL will contain basic Quiz data along with an array of responses that have occurred within the last 1-5 minutes.
Example Response Data:
{
    "id": "ABC123",
    "time_zone": -5,
    "questions": {
        "Q1010": {
            "question": "Name",
            "type": "Text"
        },
        "Q1011": {
            "question": "Email",
            "type": "Text",
            format: "Email"
        },
        "Q1012": {
            "question": "Do you like cats?",
            "answers": [
                {"answer": "Yes", "score": 10},
                {"answer": "No", "score": 0}
            ]
        }
    },
    "responses": [
        {
            "id": 10000001,
            "geo": {
                "country": "United States",
                "region": "New York",
                "city": "Fairport",
                "lat": 43.0987,
                "lng": -77.4419
            },
            "ip": ["163.153.108.129", "163.153.108.97"],
            "browser": "Mozilla/5.0 (Windows NT 6.1; WOW64) AppleWebKit/537.36 (KHTML, like Gecko) Chrome/50.0.2661.102 Safari/537.36",
            "device_id": "3706696192-129-3656572628",
            "times": {
                "start": 1463973091411,
                "end": 1463973099022,
                "pages": [6911, 700]
			},
            "score": 10,
            "questions": {
                "Q1010": {
                    "text": "Mr John Smith",
                    "score": 0
                },
                "Q1011": {
                    "text": "john@smith.com",
                    "score": 0
                },
                "Q1012": {
                    "answers": [0],
                    "score": 10
                }
            },
            "contact": {
                "name": "Mr John Smith",
                "prefix": "Mr",
                "first_name": "John",
                "last_name": "Smith",
                "greeting": "Dear John",
                "emails": ["john@smith.com"]
            }
        },
        {
            "id": 10000004,
            "geo": {
                "country": "United States",
                "region": "New York",
                "city": "Elmsford",
                "lat": 41.0696,
                "lng": -73.8133
            },
            "ip": ["163.153.108.37"],
            "browser": "Mozilla/5.0 (Windows NT 6.1; WOW64) AppleWebKit/537.36 (KHTML, like Gecko) Chrome/50.0.2661.102 Safari/537.36",
            "device_id": "3706696192-37-1111141662",
            "times": {
                "start":  1463973121305,
                "end":  1463973136805,
                "pages": [8905, 6595]
			},
            "score": 0,
            "questions": {
                "Q1010": {
                    "text": "Mrs J.S. Smithington",
                    "score": 0
                },
                "Q1011": {
                    "text": "jane@smithington.com",
                    "score": 0
                },
                "Q1012": {
                    "answers": [1],
                    "score": 0
                }
            },
            "contact": {
                "name": "Mrs J.S. Smithington",
                "prefix": "Mrs",
                "initials": "J S",
                "last_name": "Smithington",
                "greeting": "Dear Mrs Smithington",
                "emails": ["jane@smithington.com"]
            }
        }
    ]
}
Using Plugins for extra functionality
Plugins can be a useful way to add extra functionality to your quiz that can't be found in the standard features. There are a number of plugins already available that may allow you to accomplish what you need, and these are added to all the time as people request specific features.
Using the Plugins
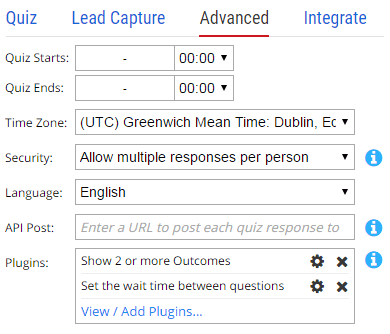
To add a plugin, go to the 'Advanced' section of the Settings tab and click the blue 'View / Add Plugins...' link.
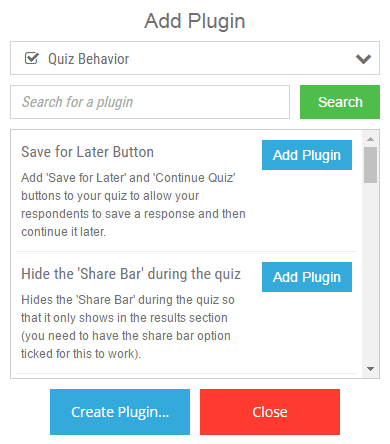
A window will open showing a list of the top plugins, you can use the search bar at the top to find a plugin that does what you want.
Click the 'Add Plugin' button and fill out any configuration fields that are required, then click 'Close' to close the window.
Creating your own Plugin
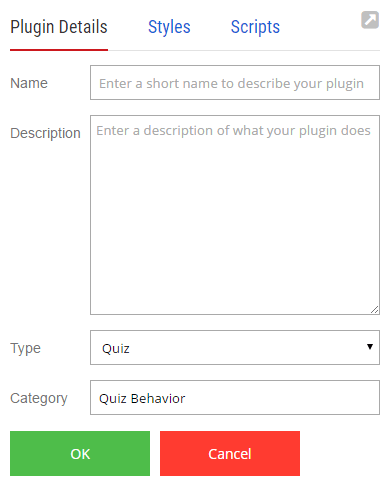
If you have knowledge of CSS or Javacsript you can create and use your own plugins. If you have created something great please let us know!
Adding Configuration fields to your plugin
If you wish to add configurable fields to your plugin you can do so by using special text codes that will be replaced by the configuration values.
The format is @field name=field type=default@
- Field Name: this can be any text and will be the label of the configuration field
- Field Type: this can be one of the following:
- text: any single line text
- textarea: any multi line text
- number: a number
- url: a web address
- email: an email address
- check: a tick box (the value of selected will be 1 and not selected will be 0)
- select: a drop down list of options. Use the 'default' section to add the options in your list, in the following format value1:text1|value2:text2
- Default: this is the default value in the configuration field (can be blank)
Integrate with external Apps
Platinum subscribers can use the 'Integrate' section of the Settings tab to connect directly to some apps. If you are not on a Platinum Subscription you can still try it out with 25 responses to get an idea of how it works.
Connect your App
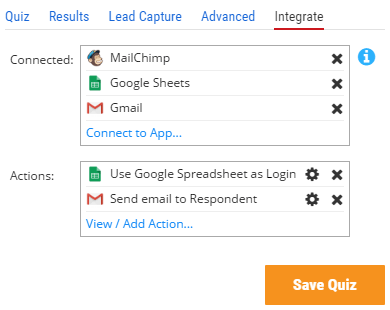
- Click 'Integrate' at the top of the Settings tab
- If you are not on a Platinum Subscription click 'Try Now' in the popup
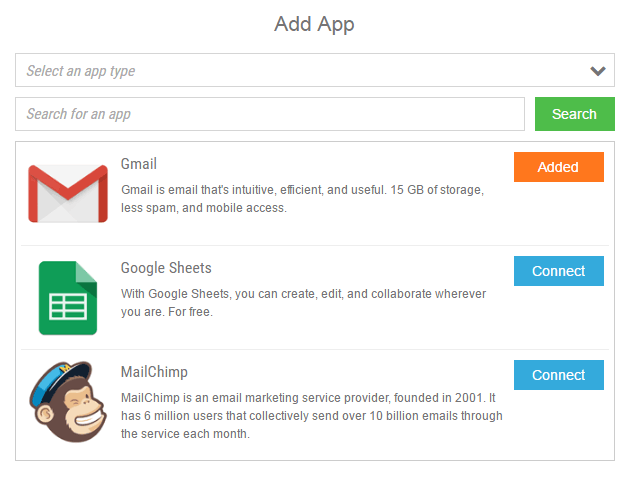
- Click 'Connect to App...' to open the 'Add App' window
- Scroll to find your app or search and then click 'Connect' to the right.
- A window will open allowing you to login to the app you have selected (make sure it isn't blocked by your browsers popup blocker)
- Enter your login details to authorize the connection - you will only need to do this once per App and it will be connected for your entire account.
- When it is authorized you should see the App name appear in the 'Connected' list.
- Once your App is connected you can Add Actions to integrate Quiz Maker with the app.
Adding Actions to your Quiz
Once you have Connected the Apps you wish to use, you can add Actions to integrate Quiz Maker with the App.
Configure your Action
- Click 'Integrate' at the top of the Settings tab
- If you haven't already, Connect to one or more Apps.
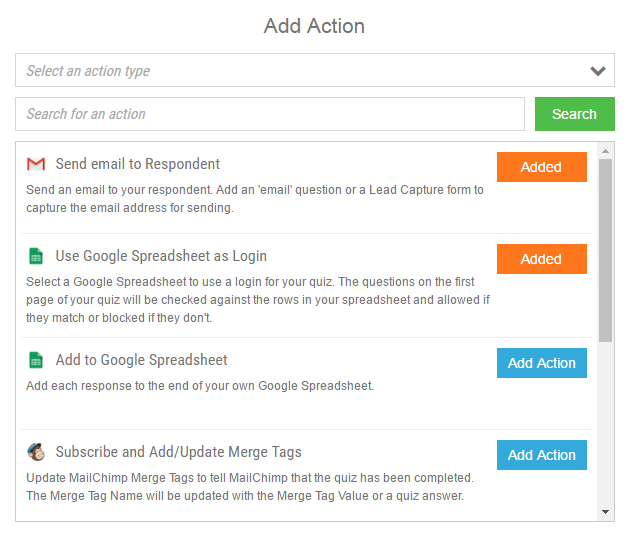
- Click 'View / Add Action...' to open the 'Add Action' dialog
- Scroll to find the Action you want or use the 'Search' function - only actions for Apps you have connected will be listed
- Click 'Add Action' to the right to add the action to your quiz.
- For most actions a Configuration dialog will open with settings for the action.
- Select the settings for the Action, for example write the email to send or select the spreadsheet to insert the Responses to.
- Click 'OK' when you are finished. If you need to change the settings for this action later you can click the 'cog' icon to the right of the action in the list.
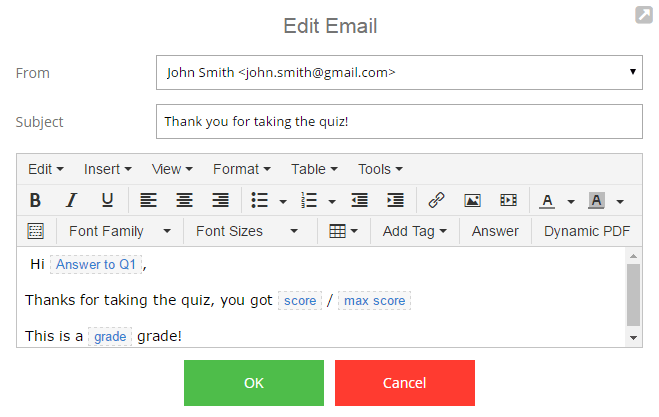
Using Merge Tags in emails
For some Actions you can write an email using Merge Tags that allow you to insert quiz answers, grades, outcomes, scores etc... into your quiz.
When the Edit Email dialog comes up you can use the 'Add Tag' toolbar button to insert details from the quiz results. To insert answers or individual question scores directly from the quiz click the 'Answers' toolbar button and select your question from the dialog.
Sharing via a Link
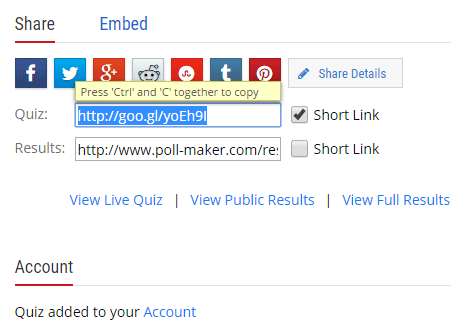
You can share your Quiz via a link (URL) which can be emailed or posted to a website, Facebook, Twitter etc... These links are permanent and will not be removed unless you decide to delete your quiz or unless the quiz is found to be in breach of our Terms.
Once you have created your quiz, use the orange 'Create Free Quiz' button at the bottom to save it and you will be taken to the 'Share' tab. Click in the box next to 'Quiz' and copy the link.
Short Links
For your convenience links are automatically shortened using Googles link shortening service. This provides you with a much shorter link to remember or share - however if you wish to use the original link just untick the 'Short Link' tick box next to the link and it will be changed back into the original link hosted at www.poll-maker.com
Sharing via Facebook / Twitter
From the 'Share' section of the Share tab, after you have saved your Quiz you can also share it to Facebook, Twitter, Google+, Reddit, Stumble Upon, Tumblr and pInterest.
If you don't recognize the icon for the service you wish to share to you can hover over the buttons to see the full name. Clicking the buttons will bring up a dialog that will enable you to post to that service. Make sure that the dialog is not blocked by a popup blocker if you have one (usually it will say in the URL bar of your browser if a popup is blocked).
Updating Share Details
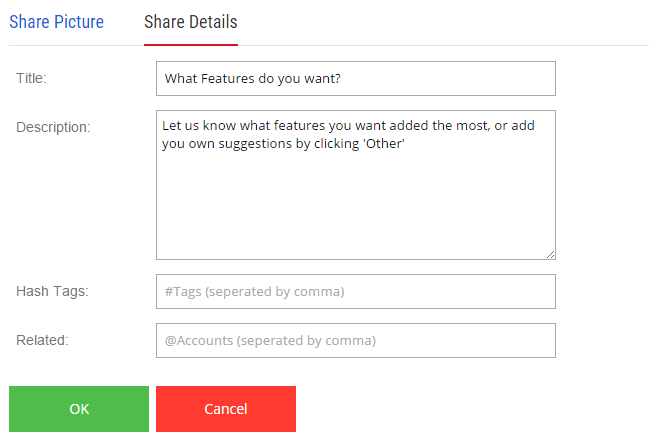
To the right of the social media buttons is a 'Share Details' button (just a pencil with no text on a Mobile) - click it to update the picture, title and description that will be shared. This will also update those details for if any of your respondents wish to share the quiz.
In the 'Share Details' dialog you can click 'Share Picture' at the top to change the picture in the same way you add a picture to a question, or you can click 'Share Details' at the top to update the title and description.
Adding Twitter #hashtags and @accounts
You can also use the 'Share Details' dialog to add hashtags and related accounts to link the Quiz back to your Twitter account.
Sharing your Public Results
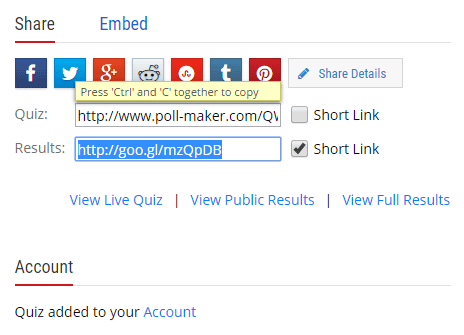
On the 'Share' section of the Share tab, after you have saved your Quiz, you will also find a link to your public results next to the label 'Results:'. Click in the box and copy the link, you can also use a Short Link as per the Quiz Link.
This link will give you the results that your quiz taker will see at the end, minus any specific Score, Grade or Outcome they personally would receive.
It is mostly useful for 'Poll / Vote' and 'Survey / Other' Quiz Types, or to link just to the Comment section or Thankyou message.
Please Note: This link is the Public results link, to best see your results it is recommend to Create a Free Account and use the Account Results section where you can see all responses, filter them and download or print your responses.
Embed your Quiz in a website
It is possible to embed your quiz directly into your own website or blog. To be able to do this your website or blog needs to allow you to post SCRIPT tags to it - if the system you use to host your website or blog strips out or blocks you from posting SCRIPT tags then the embed code will not work.
If posting the code as you usually do doesn't work, many systems have a separate section where you can directly add HTML code, check the reference and help sections of the system you use and look for words like 'Source Code', 'HTML' or 'Advanced'.
Getting your Embed Code
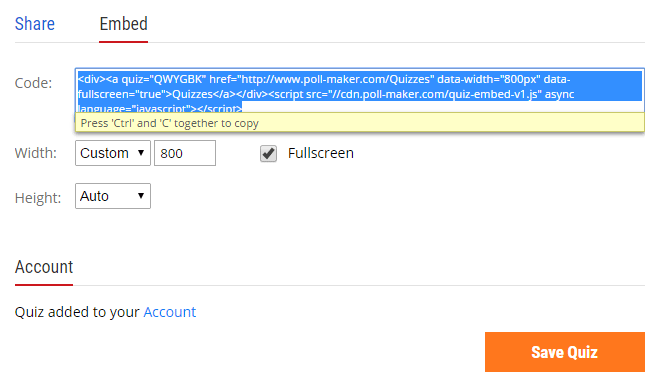
On the 'Share' section of the Share tab, after you have saved your Quiz, you will find a blue 'Embed' link at the top of the tab - click it to go to the Embed section. The box labeled 'Code' contains the code you need to post to your website or blog. You can also use the controls under the code box to change how your Quiz is embedded as explained below.
How does it work
If a Quiz is embedded the respondent will stay on your page for the entire quiz. At the end of the Quiz a 'Please Wait' message will appear in the same spot as the Quiz and then the Quiz itself will be replaced by their results (without leaving the page or changing any other content).
As soon as a respondent starts taking your quiz a special code will be added to their page URL so that if they reload or bookmark the page their quiz will return to where they left it, or show the results instead of the quiz if they have already taken it - they can remove the code easily by deleting everything after the # character in the URL before reloading the page.
Embed Controls
- Width: Set the width as a percentage of the section it is embedded in, or choose custom and enter your own width. The default is 100% of available width. Custom width numbers will be treated as Pixel's unless a different unit of measurement is specified.
- Height: Set the height as a percentage of the section it is embedded in, or choose custom and enter your own height as per the width. Auto will choose the height based on the Quizzes contents.
- Fullscreen: Some of the Themes have background images, or you can add your own to any Theme. If a Theme has a background image and 'Fullscreen' is not ticked then the background will be contained within the area that you embed the Quiz in, however if you tick 'Fullscreen' the background will be applied to the entire page that the quiz is embedded in.
Presenting your Quiz live
From the Share tab you can create presentations of your quiz for presenting live results to any size audience. See them update in real time without refreshing the page and the presenter can (optionally) control the quiz from the stage and block particpants from continuing or seeing a correct answer until they are ready.
Creating sessions
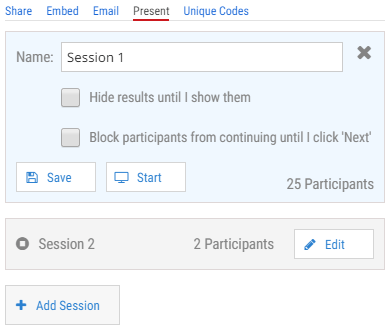
You can create your live presentation sessions from the 'Share' tab by clicking on 'Present'. Set the options for your quiz and then click 'Start' to begin your presentation.
If you wish to give your participants the quiz link prior to your event you can click 'Start' to open the presentation and get the link and then close the window and press 'Start' again to reopen it when you are starting your presentation.
Presentation Settings
- Hide results until I show them: This setting is particularly useful for Trivia / Scored quizzes as it allows you to show your participants how many people have voted for each answers without showing them the text/picture of the answer itself (to build tension/interest). Click the 'eye' button in the top right to show the actual answers - this will also activate the scoring for the participants (if you have set it to show answers during the quiz) so that they can see the correct answer on their device / computer.
- Block participants from continuing until I click 'Next': If this is set then the participants will only be able to answer the quiz up to the question you are currently displaying on screen. If they attempt to go past the current question it will display 'Waiting for Presenter' until the presenter clicks the 'Next' button.
Starting your presentation
From the 'Present' section of the 'Share' tab click 'Edit' to open your session then click 'Start' to start your live presentation.
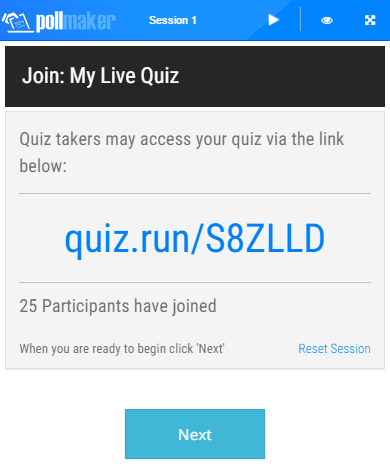
The first page of the presentation shows your participants the link to navigate to (or you can give it to them before hand) - it also shows the number of people who have joined your presentation, this will update in real time as people start the quiz.
Presentation Controls
- Play / Pause: Use the play / pause button to pause or restart the live updating of results
- Show Results: Use the show results / hide results button to make the answer text/pictures visible/invisible to your audience.
- Full Screen: Use the full screen button to set your presentation window to take up the full screen (or to close full screen mode).
Protect your quiz with Unique Codes/Links
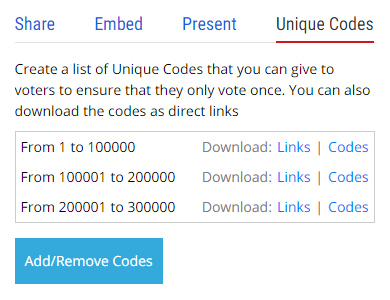
You can protect (and track) your quiz with special unique codes. You can give these codes to your respondents to control how many responses per code and track which codes have been used. Respondents will not be able to access your quiz without a unique code.
You can also download the codes as short unique links that you can send to respondents so that they can access the quiz without having to enter the code manually.
Creating your Unique Codes
To setup unique codes, first you need to change your security settings from the 'Advanced' section of the 'Settings' tab.
- Click on the 'Settings' tab and then click 'Advanced' in the top right
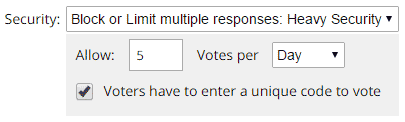
- Change the 'Security' drop down list from 'Allow multiple responses per person' to 'Block or Limit multiple responses: Light Security'
- A grey box will appear under the drop down list with more options
- Click the tick box 'Voters have to enter a unique code to vote'
- Select how many votes are allowed and for what time period
- Click 'Save Quiz' to update your quiz settings and then click on the 'Share' tab
- Click on 'Unique Codes' from the 'Share' tab
- Click 'Add/Remove' Codes and enter the total amount of codes you will need. You can add more codes at any time
Please Note: If you add more codes by increasing the amount this will not change the original codes. If you set a lower amount then codes after that amount will become invalid. - Click the download links to the right to download your codes (or to download the codes as unique links). If you have more than 100,000 codes then the codes/links will be split up into multiple files of up to 100,000 codes each.
Once you have setup Unique Codes your poll will be secured via the codes and respondents can reply multiple times from the same computer/location as long as they have a valid code (that hasn't already been used to vote more than you have allowed).
Using the Unique Codes
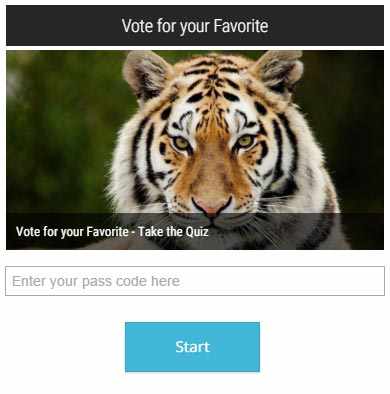
Your respondents will need to enter a code you have given them to use your quiz. Their response will then be tracked alongside that code and you can see which response belongs to which code by exporting your responses.
If you click 'Links' to download your codes as unique links then your respondents can click the link to go to your quiz and they will not have to enter a code.
Signing Up for an Account
Our accounts are 100% free and as per our Privacy Policy We will never sell, misuse or exploit any information provided to us.
Creating an account at any time will not reload the page so you can even do so in the middle of creating a Quiz, or at the end and it will still attach the Quiz to your account.
Creating your Account
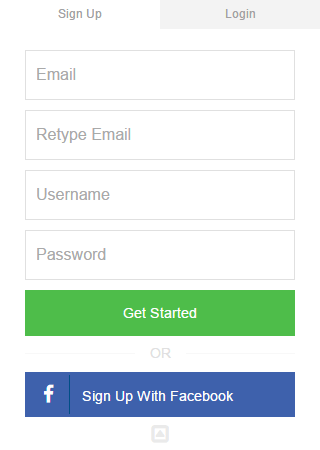
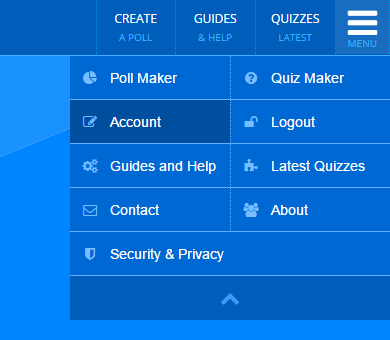
- You can create your account at any time by clicking the 'Menu' icon at the very top right of our website and selecting ' Sign up (free)' from the menu that will drop down. A new 'Sign Up' dialog will appear.
- If you want to signup via Facebook you can skip down to the last Blue button and just click on 'Sign up with Facebook'. You will be asked to login to Facebook and authorise our App to continue.
- Alternatively, Enter your Email Address in the top box
- Retype your email into the second box - this is to protect against Typo's and make sure it is the same both times.
- Type a User Name in the third box - it can be anything you like as long as it hasn't already been used and is 6 or more characters.
- Type your password in the last box - it needs to be more than 6 characters and it is recommended to use a combination of letters and numbers.
- Click the green 'Get Started' and you are done!
Already have an Account
If you already have an account and need to login you can do so by clicking the 'Menu' icon at the very top right of our website and selecting ' Login', or by clicking 'Login' at the top of the Signup form.
When you login to our website it does not reload the page so you can do so in the middle of creating or answering a Quiz, or at the end and it will still attach the Quiz to your account.
Accessing your Account
If you already have an Account you can access your Account Dashboard by clicking the 'Menu' icon at the very top right of our website and selecting ' Account' from the menu that will drop down.
You will need to Login or Sign Up for an account before you can access your Account Dashboard - you will then get access to:
- Manage all your Quizzes and Polls
- Advanced Reporting with Filters
- Data Export to Excel / CSV / HTML
- Printable and PDF Reports
- Advanced Response Management
- Quiz Security
- Lead Capture Data
- And much more!
Forgot your Password
If you can't remember your password, you can use our Retreive Password form to request a password reset link to be sent to your email address.
Forgot your Account Email
If you can't remember what email address you used to sign up with but can remember your user name you can use the second part of the Retreive Password form to login and then check your email from the Account section of the Account Dashboard
Forgot Everything
Maybe you bumped your head? It might be wise to visit your nearest Hospital or Mystical Shaman. If that fails don't hesitate to Contact Us with as much detail as possible and we will try and track down your account for you.
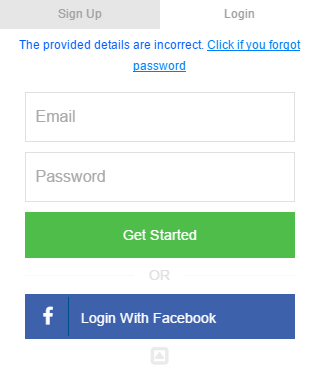
Claiming a Poll or Quiz
If you forgot to login or sign up for an account while creating your poll or quiz, it isn't too late! From the Account Dashboard click on 'Claim a Poll / Quiz' and enter as many details of your poll or quiz as possible into the form.
In most cases your Quiz or Poll will automatically be attached to your Account and if you reload the page you will see them under the Poll or Quiz section of the Account Dashboard.
Unable to Claim Poll/Quiz
If the Claim form doesn't work feel free to Contact Us with as many details of your Quiz or Poll that you can remember and we will try to track it down for you. If the email address you use to contact us is different to your account email address, please remember to send us your account email address too so that we can properly attach your poll or quiz to your account.
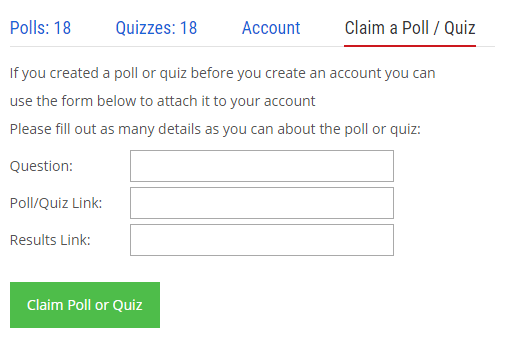
Login from the Share Tab
Disaster! You have finally finished making the best Quiz the world has ever seen and then realize you never Created a Free Account or you forgot to Login! Never fear, it isn't too late! You can login or sign up directly from the Share tab and your Quiz will automatically be added to your account.
At the bottom of the Share tab is an 'Account' heading, click 'Create a free Account' or 'Login'. If you are already logged in, it will say 'Quiz added to your Account'.
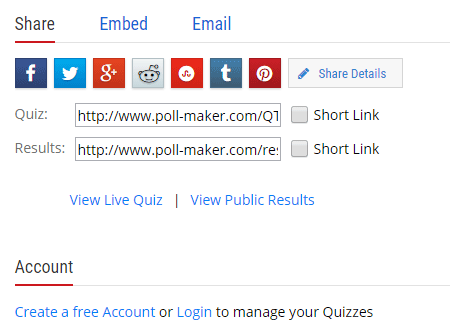
Updating your Account Details
You can update your account details from the 'Account' tab of the Account Dashboard. Enter your new details and click 'Save Details' to apply.
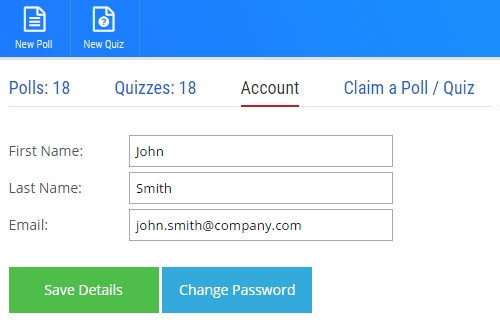
Changing your Password
You can change your password from the Account Dashboard by clicking on Account and then clicking the blue 'Change Password' button. A new window will open and you need to enter your Current Password into the top box and then type your new password in the second box, and type it again exactly the same in the third box before clicking 'OK'. You will not need to log back in after changing your password.
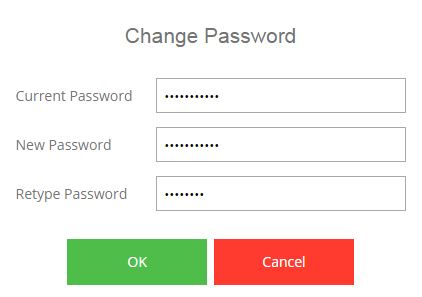
Changing your Subscription
To change or cancel your subscription you first need to visit the 'Account' tab of the Account Dashboard. Then scroll down to 'Account' and click the 'Change' or 'Cancel Subscription' buttons.
Clicking the 'change' button will take you to the 'Change Subscription' page. Used the drop down lists to select your payment frequency ('Monthly' or 'Yearly') and your Susbcription type ('Standard', 'Premium' or 'Platinum') and then click 'Change Subscription'. You can visit the Pricing page for more information on the prices and features of each version (there is a discount for paying yearly).
If you are on a trial your subscription will be changed immediately, however you will not be charged until the end of your trial period (which will stay the same length).
If you are not on a trial and are paying monthly and change your subscription before the end of your current month your account will be changed immediately and then your next monthly invoice will be effected in the following way:
- For Downgrades: Your next monthly invoice will contain a credit for the difference in price for the remainder of the current month. For example: If you downgrade half way through the month from $29 to $15 you would receive a credit for ($29 - $15)/2 = $7, so your next invoice would be $15 - $7 = $8
- For Upgrades: On your next monthly invoice you will be charged an extra amount that is the difference in price for the remainder of the current month (along with the next monthly payment amount at the higher subscription level) For example: If you upgraded half way through the month from $15 to $29 you would be charged an extra ($29 - $15)/2 = $7, so your next invoice would be $29 + $7 = $36
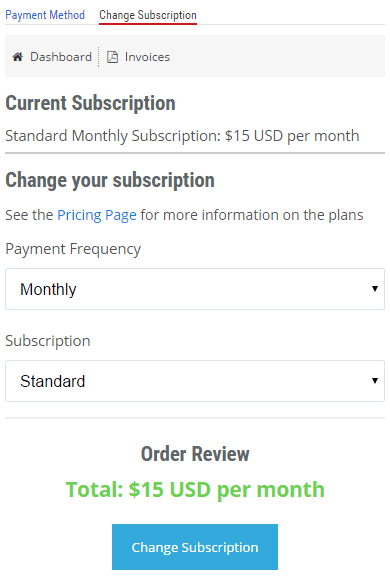
Canceling your Subscription
You can cancel or change your subscription from the 'Account' tab of the Account Dashboard. First scroll down to 'Account' and then click the 'Cancel Subscription' or 'Change' buttons.
If you are on a free 30 day trial your account will immediately revert to a 'Free Account' with a 25 response per month limit and a 'Trial' banner above every quiz. You will not lose any quizzes or responses.
If you have paid via credit card and canceled, your subscription will stop immediately and you will not be charged any further amounts.
If you wish to cancel and have paid via Paypal then there is one extra step you need to take to ensure you are not charged any further amounts. Once you have canceled via our button a dialog will show with a link to Paypal, you will need to click the link and then cancel the subscription in Paypal to finalize your cancelation. Unfortunately we are not able to cancel the subscription in Paypal automatically ourselves so this step is necessary.
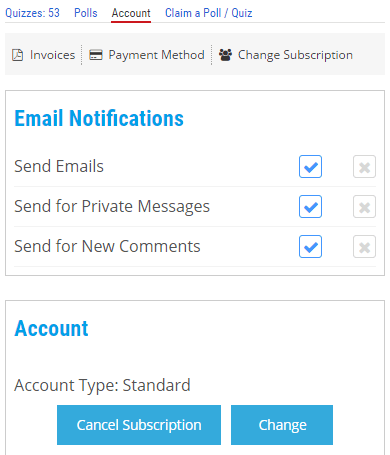
Change your Payment Method
If you wish to change your payment method you can do so from the 'Account' tab of the Account Dashboard by clicking the 'Payment Method' button in the top toolbar.
This will take you to the 'Payment Method' page which will show your current payment method and allow you to enter new card details. Enter your card details into the form under 'Enter your new payment info' and then click 'Update Details' to update your payment details.
If you are changing your payment method due to a failed payment then our system will automatically attempt to pay the outstanding invoice within a few hours of updating your card details.
Please Note: If you are changing your payment method from Paypal to a Credit Card please also visit the Recurring Payments section of Paypal and cancel your Paypal payment from there. If you wish to change from a Credit Card to Paypal please Cancel your Subscription first and then use the 'Re-Subscribe' button in the 'Account' tab of the Account Dashboard to re-subscribe - this will not effect your existing quizzes or responses.
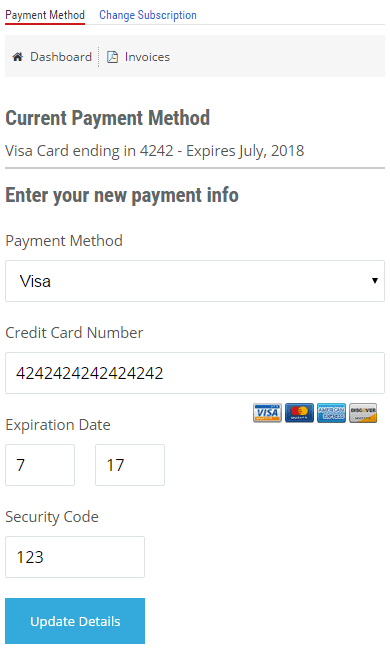
Viewing your Invoices / Receipts
To view your Invoices, first visit the 'Account' tab of the Account Dashboard and then click the 'Invoices' button in the top toolbar.
You will be taken to a page that will list all your paid invoices (and a $0 invoice for your trial period, if applicable). Click on an invoice date in the list to view, print or download that invoice.
When you have clicked on an invoice you can use the 'Print' or 'Download' buttons in the toolbar at the top to either print your Invoice or download it as a PDF document. Click the 'Back' button to return to the list of invoices.
If you need to add further details to the 'Bill To' section of your invoice you can do so by adding details to your Account from the 'Account' tab of the Account Dashboard. Under the 'Account' section you can add a 'First Name', 'Last Name' and change your Email Address and if you scroll down to the 'Company Details' section you can add a 'Company Name' and 'Company Address'. If you need to add any further details you can put them in the text box under 'Company Address' and they will also appear in the 'Bill To' section of your invoices.
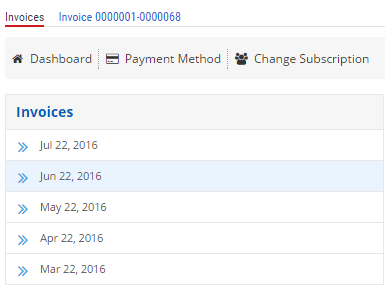
Get your API Keys
If you wish to use Zapier to integrate / communicate with other Apps (such as MailChimp, or over 500 other apps) or if you wish to make your own custom integration with a 3rd party or your own API, you will need to first get your API Keys from the 'Account' tab of your Account Dashboard.
Scroll down to under the profile picture box and click the 'Get API Keys' button. You will need to re-enter your password first as an additional security measure and the 'Get API Keys' dialog will open with your 'Public' and 'Private' API Keys.
The Public API Key is for use in our Javascript API for interaction client side with your embedded quizzes (or the embedded quiz maker tools for our partners). It can be disclosed and used publicly (eg: Client Side) without security implications to your account.
The Private API Key is for use in our REST API or for integrations via Zapier. It is not to be disclosed publicly and is only for use in Server Side applications, as revealing it publicly would compromise the security of your quizzes by allowing others to access your account.
Please Note: Zapier integrations are no longer in 'Beta' and are publicly accessible, please see the integration guide for more information. Currently the Quiz Maker Javascript and REST API's are in 'Beta' testing and are invite only, they will be released publicly soon.
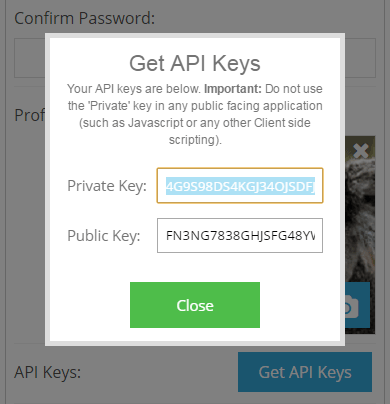
Viewing your Active Quizzes
You can view your active quizzes from the Account Dashboard by clicking Quizzes up the top.
A list of your most recent Quizzes will appear in the list sorted by the most recently created. If you have a large amount of quizzes you can scroll down to the bottom of the page to load more of your active Quizzes.
Sorting the Active List
Click the column headers to sort by a different column (eg: Responses) and click again on that column to change the sort order from Descending to Ascending and back.
The up or down arrow in the top right of the column header indicates which columm the list is currently sorted by and if it is Ascending or Desending.
Managing your Quizzes
Clicking on a quiz in the list will expand it to show a variety of buttons that you can use to manage your quiz, including Editing, Publishing, Stopping, Clearing or Copying the quiz. You can also click the white refresh icon to the right of the quiz title to update the quiz details (such as number of responses or last response) without reloading the page.
Quiz Titles
If a Quiz does not have a Title (or doesn't have any text in the title) it will be listed under the contents of the first question with 'Q1: ' in front of it (eg: 'Q1: What is your name')
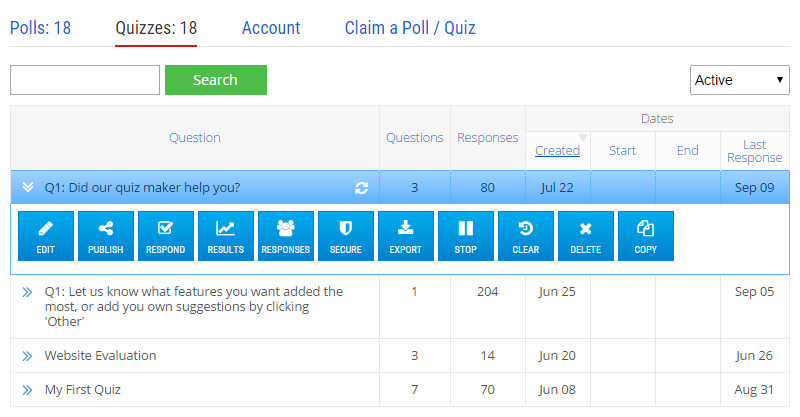
Viewing your Stopped Quizzes
Click on Quizzes from the Account Dashboard and change the drop down at the top right of the list from 'Active' to 'Stopped'.
Your stopped quizzes will load and can be managed in the same way as your Active Quizzes.
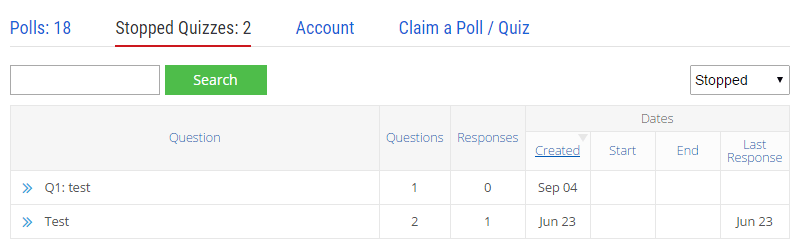
Searching for a Quiz
- Click on Quizzes from the Account Dashboard to see a list of your top Active or Stopped quizzes.
- Click inside the box at the top with the green 'Search' button next to it and type a word or words from the Title or Questions of your quiz.
- Click the green 'Search' button and the list below will change to any quizzes containing those words - if the drop down list in the top right says 'Active' only Active Quizzes will show and likewise for Stopped.
- The quizzes can be managed in the same way as your Active Quizzes
- Clear the search box and click the 'Search' button again or reload the page to load the unfiltered list
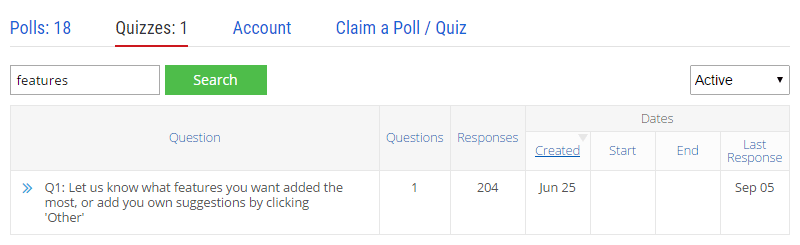
Editing an existing Quiz
To edit an existing quiz, click on the quiz in your Quizzes List and then click the ' Edit' button. You will be taken to the Account Quiz Editor page when you can update your quiz and then click the orange 'Save Quiz' button.
Will it effect existing results?
Editing an existing quiz will never delete or effect existing quiz responses, however if you remove an answer from a question, or remove a question then that answer or question will no longer show up in reports or exports of previous responses.
You can safely add new answers and new questions or edit the text, pictures or other details of existing questions and answers without effecting previous responses.
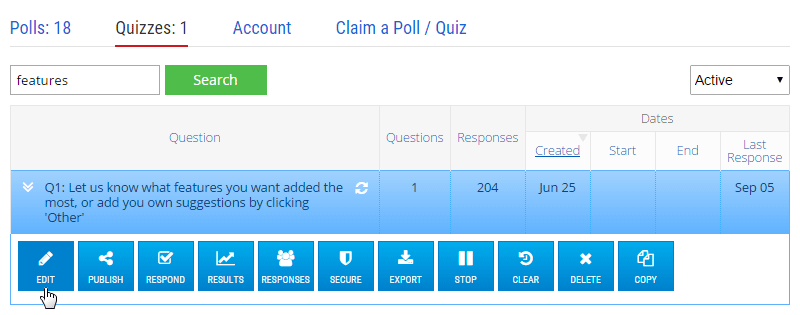
Publishing an existing Quiz
To access the share links, embed codes or social media sharing buttons for existing quizzes first click on the quiz in your Quizzes List and then click the ' Publish' button. You will be taken to the Share tab of your quiz on the Account Quiz Editor page where you can find all the share and embed details.
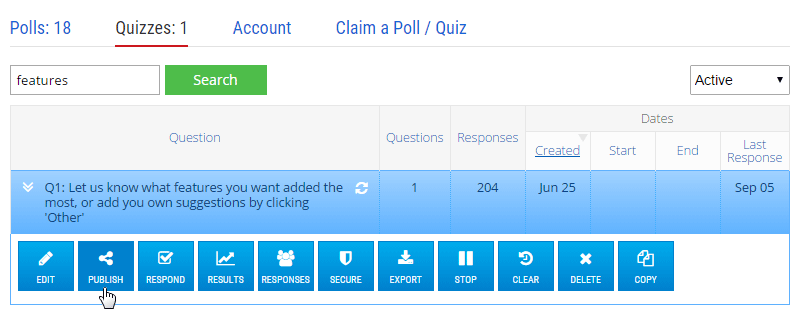
Viewing your Results
To access the full reports and filters for your quiz first click on the quiz in your Quizzes List and then click the ' Results' button. You will be taken to the Account Results page where you can:
- Apply Filters to your reports
- View the Geographical Response Heat Map
- View the Response Time Line
- View your Quiz Comments
- Print your reports to PDF / Paper
- Manage your quiz results
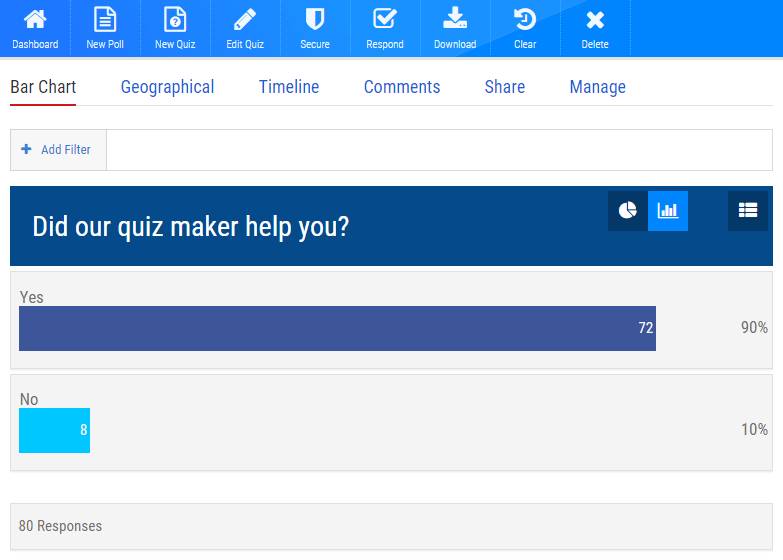
Viewing individual Responses
To access and manage a full list of responses to your Quiz first click on the quiz in your Quizzes List and then click the ' Responses' button. You will be taken to the Manage Responses page where you can view or delete your responses.
A list of individial responses will load sorted by quantity of responses, you can sort the list in the same way as the Active Quizzes list. Scroll to the bottom of the list to load more responses.
Viewing a Response
Click on a response to view it and it will expand to show the answers to each question. At the bottom you can see the date of the response and the score (if applicable). Click the open icon to the right of the response answers to view the actual report that the respondent was given at the end of their quiz (it will open in a new window).
Filtering your responses
Use the 'Group By' drown down list at the top to change how responses are grouped then click the green 'Search' button. For example if you change it to 'Group By: IP & Computer' then the list below will show only one row per unique combination of Computer Fingerprint and IP Address.
If one row has multiple responses you can click on the response and use the left and right arrows in the blue bar underneath the answers to see the answers for each response in the group.
Please Note: The response list is not filtered by the Quiz Security settings, however if you have security settings applied it will show in the list if a response is counted or not. For example it might say '2 / 4' in the responses column to show that only 2 of the 4 responses are counted in the results. Also, when you click on the response it will say in the blue bar underneath the answers if a response is 'Counted' or 'Not Counted'.
Search for a response
Use the box at the top labeled 'Search' to enter a word to search for and then click the green 'Search' button to perform the search, you can search for any answer to a text question or an IP Address, Location or Browser Tag.
If you have performed a search for the answer to a text question the 'Browser' column will change to show that question instead of the browser details.
Clear the box and click 'Search' again to return to the unfiltered list.
Deleting Responses
You can also Delete Responses from your quiz via this page or the Secure Quiz page.
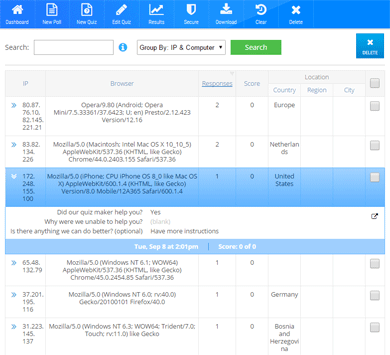
Printing individual Responses to PDF / Paper
If you want to print every response to your Quiz (or a subset of them) you can do so from the Manage Responses page.
- Access the Quizzes List and click on Responses for the quiz you want.
- If you have a large amount of responses you will need to first keep scrolling down the page until they have all loaded onto the page (you will know you have reached the end when it stops loading more as you scroll).
- Find and click the 'Print' button on your Browser
- If you want to print to PDF and you are using the Chrome browser then simply change the 'Destination' to 'Save as PDF'. In other browsers you can download free Print to PDF extensions (eg: Cute PDF) - install one of those first.
- In the print preview you will see that all the responses have expanded to show all the answers for each response. If you have grouped responses with the 'Group By' dropdown then it will only show the 1st response for each group.
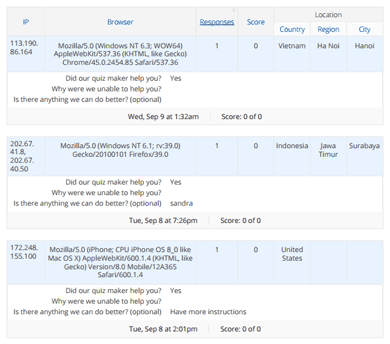
Adding Responses to your Quiz
If you want an easy way to actually take your Quiz, you can do that with the ' Respond' button from the Quizzes List. It will open your live quiz in a new window.
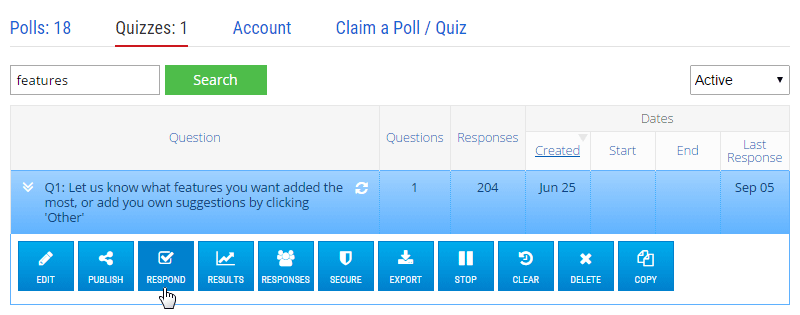
Securing your Quiz
It is possible to change how your quiz reacts to multiple responses from the same person after the quiz is already live. Changing these settings never deletes responses and can be changed back at any time.
Change the 'Security' drop down and other options at the top and the responses list below will update live as you change the settings. When you are happy with the changes click 'Save' to make those changes live.
The responses list will show which responses are counted and not counted in the 'Responses' column. For example the value '2 / 4' indicates that only 2 of the 4 total responses from that person have been counted in your reports and data exports.
You can also click on a group of responses to see the actual quiz answers from that person. The blue bar under the answers will show either 'Counted' or 'Not Counted' and you can navigate between responses in the group with the left and right arrows in the blue bar.
In addition you can Delete Responses or view the response reports as per the Responses List.
What each setting means
A more detailed explanation of the security options can be found under the Blocking people from responding section.
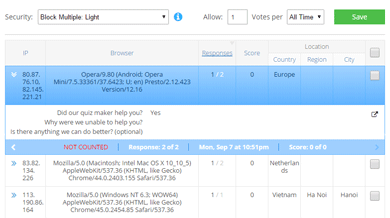
Exporting Results to Excel/CSV/HTML
- First click on the quiz in your Quizzes List and then click the ' Export' button.
-
Select the file type from the 'File Type' drop down list. A CSV File is a Comma Separated Variable file that can be imported into most applications.
Please Note:Some versions of Microsoft Excel will show a warning message when you first open the downloaded 'Excel' file. This is due to the way the file is formatted and can safely be ignored.
-
Change the 'Results' drop down to the type of results you require.
- All Results will download every response to your quiz even if it has been filtered out of your reports by the Quiz Security settings.
- Counted Results will download only those responses to your quiz that have been allowed based on the Quiz Security settings.
- Lead Capture Data will download just the lead capture data that was entered based on your Lead Capture settings. However, 'All Results' and 'Counted Results' also include the Lead Capture data.
- Click 'OK' and your file will start downloading.
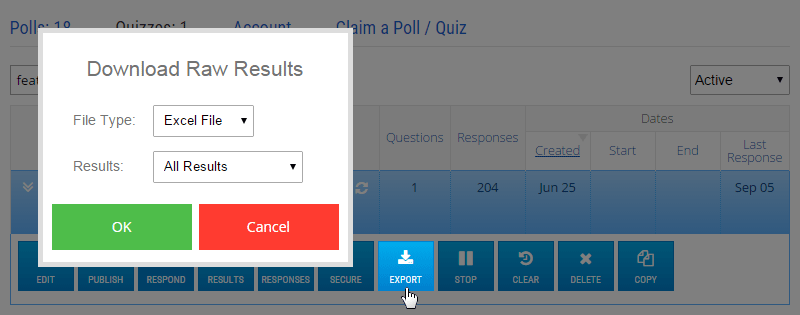
Download Lead Capture Data
You can use the Export Data feature to export your Lead Capture data. All downloaded results will include your Lead Capture data matched up to the quiz response it comes from, however you can also change the 'Result' type in the download dialog to 'Lead Capture Data' if you wish to download the Lead Capture data by itself.
For the File Type 'Excel' or 'HTML' if you download 'All Results' or 'Counted Results' the Lead Capture data will be in green columns after the other quiz answers.
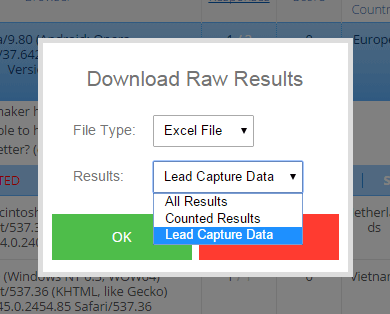
Stopping your Quiz
To immediately stop an active quiz, first click on the quiz in your Quizzes List and then click the ' Stop' button.
Stopped quizzes will appear in the Quizzes list and accessing them will show a message saying that the quiz is no longer active. When a quiz has been stopped it will no longer accept new responses.
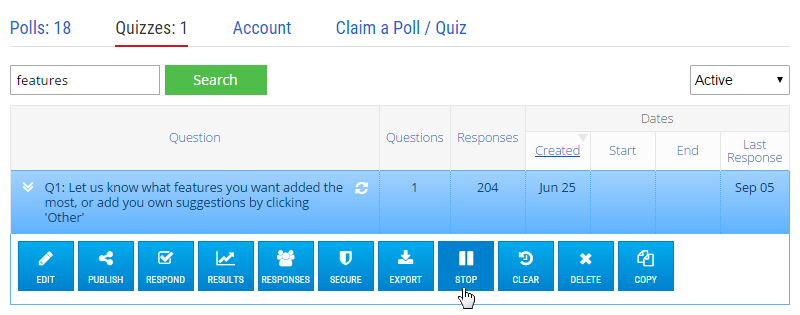
Clearing your Quiz Results
To reset your quiz responses back to zero and remove any existing responses you can use the Clear button. First click on the quiz in your Quizzes List and then click the ' Clear' button. You will be asked to confirm, so click 'OK' to remove all responses.
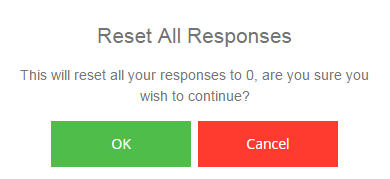
Deleting your Quiz
If you want to completely delete your quiz altogether first click on the quiz in your Quizzes List and then click the ' Delete' button.
If you have previously shared, linked to or embedded your quiz it is recommended that you Stop your quiz instead of deleting it.
How is it different to 'Stopping'
The link (or embedded quiz) for a stopped quiz will show that the quiz has been stopped, however the link for a deleted quiz will not work at all and an embedded quiz that has been deleted will show an error message.
Creating a copy of your Quiz
To make a direct copy of a quiz, or to make a new quiz based on an existing one you can Copy your quiz.
- Click on the quiz in your Quizzes List
- Click the ' Copy' button.
- You will be take to the Account Quiz Editor page with all the details of the 'copied' quiz preloaded.
- Make any changes you wish to make and then click 'Save Quiz' to create the copy of your quiz. This will not effect the original quiz.
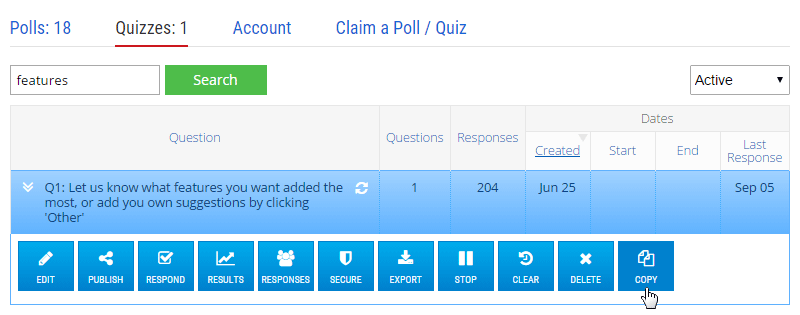
Deleting Individual Responses
You can delete individual responses to your quiz from either the Responses or the Secure Quiz sections.
- Tick each response (or group of responses) you wish to delete in the tick box to the right of the row.
- Tick as many as you want and then click the 'Delete' button at the top right of the page. A dialog will open asking you to confirm.
- If you have grouped your responses with the 'Group By' drop down you can tick 'Don't delete the last response' in the confirm dialog and the latest response from each group will not be deleted.
Filter Results by Question
From the 'Bar Chart' section of the Account Results page you can easily create in depth reports filtered by question.
- Click the ' Add Filter' button at the top of the report and the filter section will expand
- Click on 'By Question' in the 'View Filters' list to the left
- A list of your 'Select One', 'Multi Choice' and 'Drop List' Question Types will appear in the list on the right.
- You can tick an entire question or one or more answers to filter by that answer.
- As you tick answers you will see them appear in the bar above with a color square next to them. These are your currently active filters and the colored square shows what color the bar will have in the reports.
- You can untick an answer to remove that filter, or click the arrow to the right of the filter in the bar across the top and select ' Remove'
What does Filtering do?
When you filter a report by question it will change the report so that all the bar charts (and pie charts, data tables etc...) show the results split up by the answers in that original question
For Example:If you have the following two Select One questions: 'Q1: Cats or Dogs?' and 'Q2: Birds or Fish?' and you filter by question using 'Q1: Cats or Dogs?':
Your report will then show two filters across the top: 'Q1: Cats' and 'Q1: Dogs' with different colors for each as per the picture on the right.
In this example 6 people have responded with 4 answering 'Cats' and 2 answering 'Dogs'. The top graph now shows 2 bars for each answer and as you would expect only the top bar under 'Cats' has 4 responses and the bottom bar under 'Dogs' has 2 responses - this is because there is no possiblity that people who have answered 'Cats' could also have answered 'Dogs' at the same time.
The bottom graph shows that 2 people who answered 'Cats' also answered 'Birds' and 1 person who answered 'Dogs' also answered 'Birds'.
You could use the bottom graph to conclude that most of the people who liked 'Birds' where people who also liked 'Cats'
Saving a Filtered Report
After you have applied your filters it will update the URL in the address bar so you can safely bookmark the page in your browser to access the filtered report at a later time.
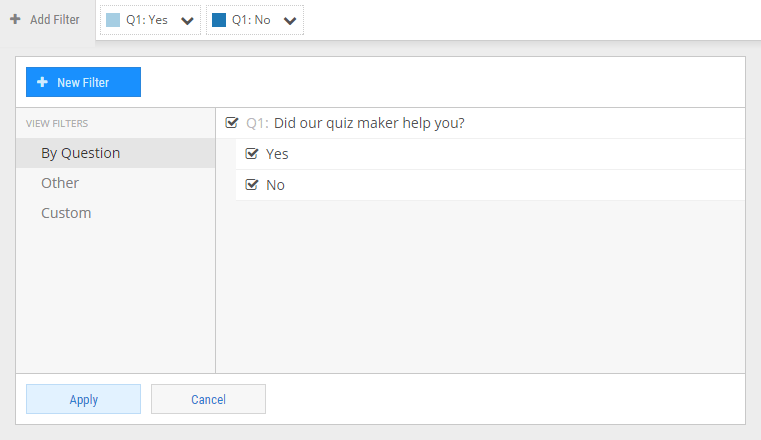
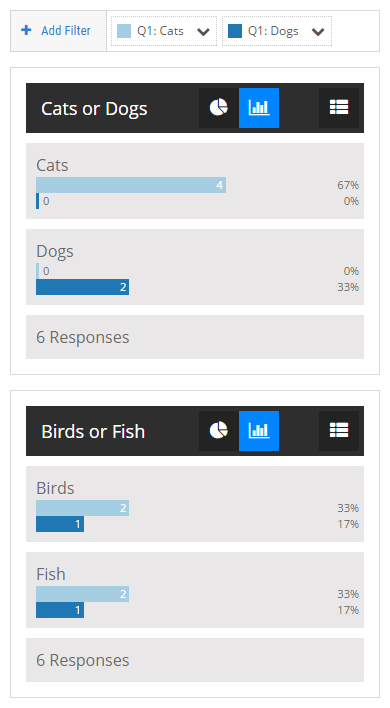
Filter by Country/Browser/Public
You can also filter your reports by other filters such as Country, Browser and Public (a response is considered 'Public' if it was received from our Latest Quizzes list).
- Follow the steps to filter your results by question
- Click on 'Other' in the list under 'View Filters'
- Tick the item you want to filter the report with, or tick an entire group (eg: 'Country' or 'Browser') to add all options in that group.
- You can mix these filters, By Question filters and Custom Filters if you want to.
- Click 'Apply' when you are done and your report will update.
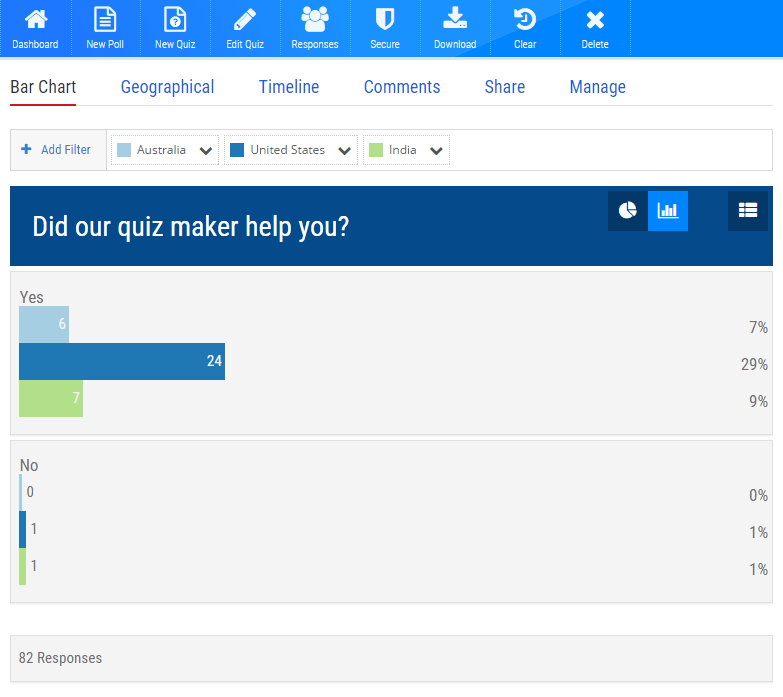
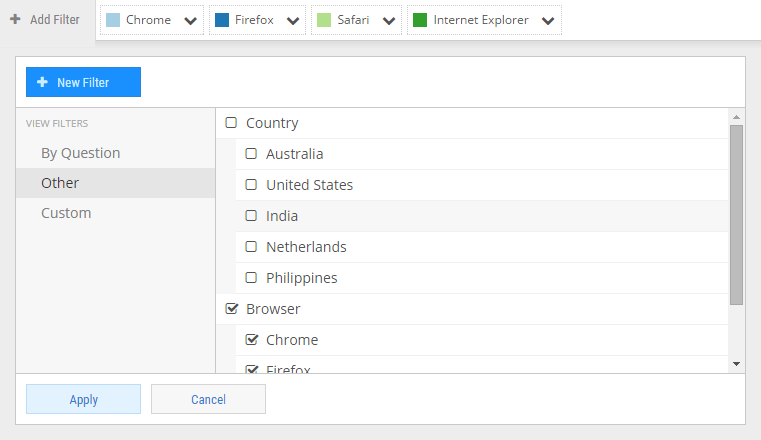
Creating Custom Filters
For in depth reporting you can create your own custom filters of any level of complexity. These filters are saved for each quiz and can be re-used within the quiz at a later stage.
- Follow the steps to filter your results by question
- Click on 'Custom' in the list under 'View Filters' to see your existing Custom filters
- Click on 'New Filter' at the top of the filter box to create a new Custom Filter
- Give your filter a name that will make sense later at the top of the filter box.
- Select a question from the list next to 'Question:' - you can only select 'Select One', 'Multi Choice' and 'Drop List' Question Types
-
You can change the second drop down list to one of 4 options:
- contains: means that the respondent has selected the answer within their question (good for 'Multi Choice')
- equals: means that the respondent has only selected the answer you indicate and no other answer
- does not contain: means that the respondent has not selected the answer you indicate at all, but may have ticked other answers for 'Multi Choice'
- does not equal: means that the respondent has not selected the answer you indicate as their only option
- Select an answer from the third drop down list - it will show only the answers from the question you have already selected
- Click '+ OR' on the far right if you want this condition to match the response based on 'OR' logic (eg: 'Q1' equals 'Cats' OR 'Q2' equals 'Fish')
- Click 'Add Condition' to add a new 'AND' condition to your filter. For a response to be listed under this filter it has to meet the criteria for every condition you list (eg: 'Q1' equals 'Cats' AND 'Q2' equals 'Fish').
- Click 'Save' you you are done to save your new filter
- Add any other filters you wish to add and then click 'Apply' when you are done and your report will update.
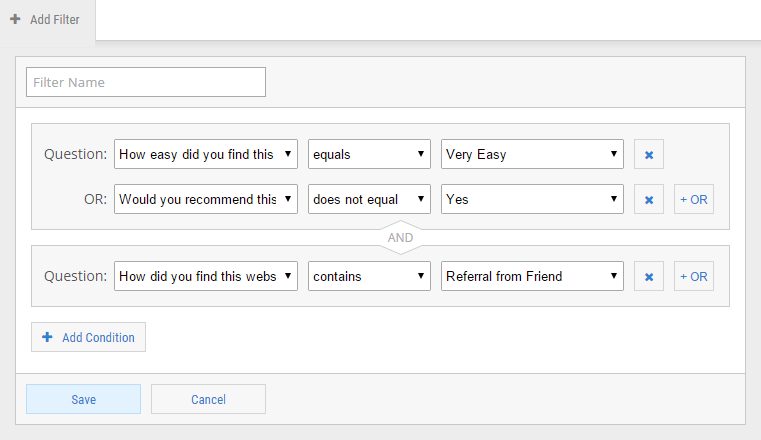
Viewing the Data table for a graph
On the 'Bar Chart' section of the Account Results page you can add a 'Data Table' to any one of your graphs. The Data Table will show under the graph and will display the exact values for each option in the bar chart - it is useful for printed reports, PDF's or Powerpoint Presentations. Click the 'Data Table' icon on the top right of a graph to show or hide the data table.
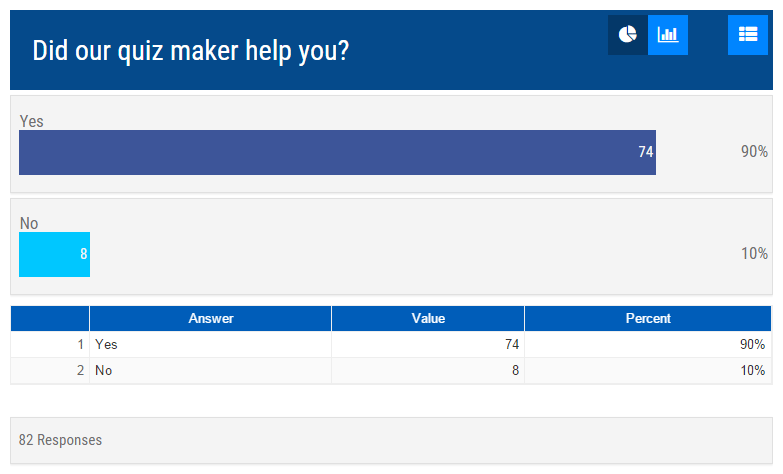
Change between Bar & Pie Chart
On the 'Bar Chart' section of the Account Results page you can change each individual graph to a Pie chart instead of the default Bar Chart if you need to - this is good for printed reports or presentations. In the top right of each graph click the 'Bar Chart' icon to show only the bar chart and the 'Pie Chart' icon to show only the pie chart.
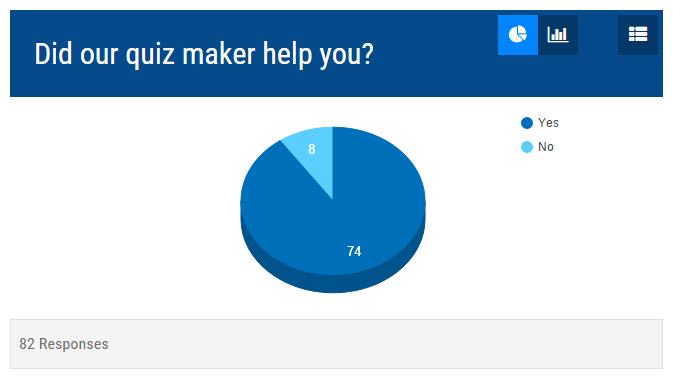
Printing reports to PDF / Paper
- Login to your account, select the quiz you wish to report on from your Quizzes List and click the ' Results' Button
- At the top of the reports hit 'Add Filter' to add any Filters you need in your report
- Use the buttons on each graph to change the graph type to Pie/Bar or add a Data Table
- Find and click the 'Print' button on your Browser
- If you want to print to PDF and you are using the Chrome browser then simply change the 'Destination' to 'Save as PDF'. In other browsers you can download free Print to PDF extensions (eg: Cute PDF) - install one of those first.
- In the print preview the page will automatically change to a print ready document - you may need to tick "Background Graphics" to see the report best
You can also print the full responses to your Quiz, and Print the Quiz itself.
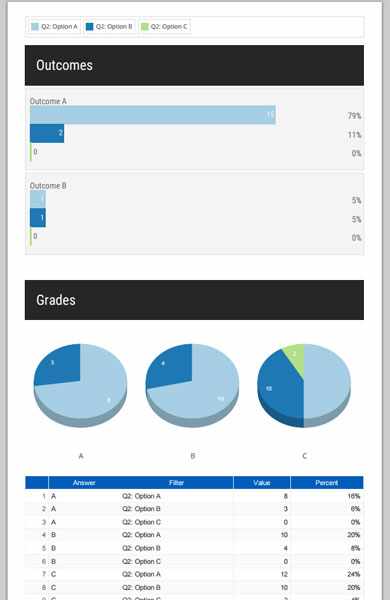
Viewing the response Time Line
You can view the response Time Line from within your Account Results by clicking on the blue 'Timeline' link at the top of your report.
This graph shows the quantity of responses over time - the time scale automatically adjusts based on how long the quiz has been active and 1 point does not always represent 1 day or 1 hour.
Download the Time Line
Click the blue download button in the top right of the Time Line to save it as an image to your local computer (for use in reports etc...).
Viewing the response Map
You can view the response Location Heat Map from within your Account Results by clicking on the blue 'Geographical' link at the top of your report.
This map shows the intensity of responses from each region of the world. Red indicates a large amount of responses, yellow indicates a moderate amount of responses and green indicates few responses. You can zoom in and out of the map with the vertical drag bar on the left of the map, and you can click and drag to move around the map.
Download the Map
Currently the only way to download a copy of the map is to use a Screen Capture.
Viewing your Comments
You can view your quiz comments from within your Account Results by clicking on the blue 'Comments' link at the top of your report. This will show the Facebook Comments box and you can review the comments and/or add comments.
Moderating Comments
Unfortunately it is not possible to moderate the comments, however you can report inappropriate, offensive or spam comments to Facebook by hovering over the comment and selecting the down arrow that appears to the right of the comment.
Select 'Flag comment' or 'Report to Facebook' and follow the Facebook prompts (you will need to login to Facebook).
How do I know who has responded to my quiz?
In most cases the easiest way to know who has responded to your quiz is to ask the respondent directly what their name or email is. You can do this by adding a name or email question directly into your quiz, or ask before the results with our Lead Capture feature.
Alternatively you could use the Unique Codes feature to create a list of unique links for people. If you keep a list of who you have sent each link to, you can then see which response belongs to each code when you export your results to Excel or CSV.
The final option is to add a tracking code to the end of your Quiz Link before you send it to people. The tracking code can contain any text up to 50 characters and will also be reported out in a separate column when you export your results to Excel or CSV. The format of the tracking code is to add ?t=yourtrackingcode to the end of the Quiz link that you get from the Share section of the Share tab - however you will first need to untick 'Short Link' to get the original Quiz Maker link instead. Here is an example link with tracking code: https://www.quiz-maker.com/QP7DSW?t=john.smith@example.com. In this example it is adding the email john.smith@example.com as the tracking code.
Some email systems such as MailChimp allow you to use Merge Tags to automatically embed information like a tracking code into your emails. For example the tracking link for the previously mentioned quiz would look like this in a MailChimp Email or Newsletter: https://www.quiz-maker.com/QP7DSW?t=*|URL:EMAIL|*
How do I view the responses
There are a number of different ways you can see who has responded to your quiz. All are accessible via your Account Dashboard - First click on the quiz you wish to see then:
How do I add a name or email question?
- Use the Add Question button to add your new question
- Then click inside the question text box and type 'Name' or 'Email' as required
- Use the Type section to change the question to 'Text' type
- From the Question Behavior Tab of the question you can set the format of the text the respondent is required to enter. For example: email address, number or website address.
Change the way a Question displays or behaves?
Click inside the question text box to select your question and under the answers are tabs for changing 'Type', 'Behavior', 'Display' and 'Logic'
- Type allows you to select if the question is a Text, Select One, Multi Choice etc...
- Behavior lets you change how a question acts in the quiz, is it skipable, minimum and maximum answers etc...
- Display lets you set how a question will look, if it has columns or is on a new page etc...
- Logic is for changing the flow of your quiz based on previous answers
Can I print the quiz to use as a paper test?
Yes, it is very easy to print the quiz itself - just load the quiz as you would to answer it and then use the print button on your browser. It will automatically format itself for printing and it doesn't matter if the questions are on separate pages.
Printing the Quiz to PDF
- Login to your account, select the quiz you wish to report on from your Quizzes List and click the ' Respond' Button
- Find and click the 'Print' button on your Browser
- If you want to print to PDF and you are using the Chrome browser then simply change the 'Destination' to 'Save as PDF'. In other browsers you can download free Print to PDF extensions (eg: Cute PDF) - install one of those first.
- In the print preview the page will automatically change to a print ready document - you may need to tick "Background Graphics" to see the quiz best
Can I explain why an answer is correct / incorrect?
Yes you can do this from the scoring tab of your quiz and add an explanation for a correct answer and/or one for an incorrect answer. Alternatively you could use an 'Instructions' question type on the next tab to explain an answer in more detail or combined with Question Logic to provide a different explanation for each answer or combination of answers.
Correct/Incorrect Explanations
Click Add Explanation from the Scoring tab to explain your answers.
Advanced Explanations
Use the Instruction Question Type to do this. All you need to do is set your quiz up as a Trivia Quiz Type and then make every second question in your Quiz an Instruction question type and add the explanation of the answer for the previous question.
That way as your quiz takers answer the quiz they will be shown if their answer is correct or incorrect (and/or shown the correct answer) and then taken to the next page which will be an explanation of the previous question with a 'Next' button at the bottom.
Use Question Logic on your original question to 'Hide' the Instruction questions that you do not wish to show based on the answer the respondent has selected.
If you are making a Trivia quiz and using the Numbered Progress bar you can hide these instruction questions from the progress bar using the Plugin 'Hide Instruction questions from Numbered Toolbar'.
Can I add a button to retake / start the quiz again?
You can add a restart button in any place you can add custom tags, for example the Custom Thankyou Message, Outcomes or Grades.
To add your restart button just add the text {restart button} to your message and a button will display that says 'Start Again' and takes you back to the start of the quiz. You can also use the special format {restart button=Your Text} to use your own text on the button and replace the 'Your Text' with the text you want the button to display.
Print responses and show the answers
There are two possible ways to print every response and show the answers and if they are correct or incorrect.
Printing all Responses
Using the method for printing individual responses will print out a box for every respondent that shows their answers, the score they received for each question and their total score.
Printing individual Responses
This will require you to make a change to an option on your quiz first.
- Click Edit Quiz from your Account Dashboard
- Go to the Settings tab and select 'Results' from the top.
- Tick Show answer for each question and change the drop down to 'in results' and then save.
- Go back to the Account Dashboard and select the quiz and click Responses.
- Click on a Response in the list (it will highlight blue and expand) and then click the little arrow inside a square in the top right of that box.
- A new window will open with that persons response - in that window select 'Print' from the browser menu (or right click and select print)
- The quiz will format itself for printing and will show each question, what they have selected, if they are correct/incorrect, and the correct answer.
Can I make a Poll with the Quiz Maker
You can use the Quiz Maker tool to make polls as well as Quizzes. This allows you to make polls with multiple questions, outcomes, scoring or advanced features.
Making your Poll
- Type your question into to the Quiz Maker and then type your answers below the question in the boxes provided. You can also add additional questions, pictures etc... as required.
- Click the orange 'Create Free Quiz' button at the bottom of the Quiz Maker or click the 'Settings' tab at the top
- A window will open asking you to select a Quiz Type
- Click the option 'Poll / Vote' and your Quiz will become a poll
- You can change any further options you want on the 'Settings' tab, or change the theme on the 'Theme' tab.
- Click the orange 'Create Free Quiz' button to save your Poll and you will be taken to the 'Share' tab.
- Share the poll via Facebook or copy the provided link or embed your poll as required.
Force respondents to enter text in a custom format
You can force respondents to enter text in your own custom format from the Behavior section of the Question in the Quiz Maker. Change the 'Format' to 'Custom' and then enter your custom format into the text box that appears underneath.
Custom Format using Regular Expressions
The Custom Format needs to be entered as a regular expression. The regular expression is case sensitive and must match the entire text that is entered by the user. If you wish to only add a portion of the text entered, you can add [\s\S]*? at the start and end of your regular expression.
Show a subset of questions from a larger group
The easiest way to achieve this is to add the Plugin "End Quiz at a fixed question number" to your Quiz:
- In the Quiz Editor click the Settings tab and select 'Quiz' at the top
- Tick 'Randomize question order for entire quiz'
- In the Quiz Editor click the Settings tab and select 'Advanced' at the top
- Next to Plugins click 'View / Add Plugin...'
- Find "End Quiz at a fixed question number" and click 'Add Plugin'
- Set the Question Number that you wish to end the quiz at
Using Question Logic
For more advanced logic you could also use Question Logic to show your respondents a subset of questions from a larger group of questions. However to do this you will need to have an understanding of Question Logic.
Setting up your Logic
This example assumes you have 20 total questions and you wish to randomly show only 5 questions to your respondents
- Add all your questions to your Quiz
- From the 'Quiz' section of the 'Settings' tab select Randomize Question Order
- For each question in the quiz:
- Click to select the question and select the Logic tab.
- Change 'When answer is' to 'Is Question Num' (if there is no logic item already present then click 'Add Logic').
- Type the number of questions you wish to show (eg: 5) in the box to the right.
- Change 'Skip to Question' to 'End Quiz'
Adding fixed questions/instructions at the start
You can also add as many questions as you want at the start of the quiz that aren't randomized. To do this you need to change the Randomize Question Order to start after your initial questions and then add the extra questions on to your question total.
So for example if you wish to show 2 questions always at the start and then 5 from your group of 20, you can set 'Randomize Question Order' to 'after page 2' and then set every other question to 'Is Question Num: ' 7 (instead of 5).
Grouping Questions
If you do not want randomize every question and instead show random groups of questions you can use the 'Randomly' function of Question Logic along with 'Skip to Question' to randomly direct your respondants to different groups of questions instead.
Find the Top Score & Lowest Time Taken
To find the respondent with the best score in the shortest time you can use the Responses List. Just click the title 'Score' once at the top of the page and your responses will be sorted in descending order, showing you the best score at the top.
If you have multiple respondents with the top score they will be sorted with the shortest time taken first. If their are multiple respondents with the same top score and response time then the first one to have achieved that top score and response time will be listed first.
Click on the response to see the actual answers and a status bar that shows their score, time taken and response date/time.
Can I integrate with other services, email, etc...
Yes there are three main ways of integrating with other services such as MailChimp, Gmail, etc...
- The easiest way is to use Zapier which automatically integrates Quiz Maker with over 500 apps, including MailChimp, Gmail and SMS.
- For Platinum Subscriptions use our built in Integrations Module to integrate with some of our most requested apps
- Alternatively you can build your own custom integration using our Javascript and REST API (this is currently invite only, but will be released publicly soon).
Zapier
Use Zapier and your Private API Key to create amazing custom events and logic that allows you to integrate with over 500 apps. For example you could:
- Email respondents to your quiz with custom emails based on their response (or including any of their responses in the email)
- Insert emails (and names) captured from your Lead Capture Form straight into a MailChimp Newsletter
- Insert emails (and names) captured from your Lead Capture Form into a Sales Force sales flow
- Notify yourself and/or others when certain combinations of quiz answers have occured (such as a negative response to a feedback quiz)
- Automatically add your quiz responses to a Google Spreadsheet
- Pretty much anything you can think of!
Integrations Module
Upgrade to a Platinum Subscription to access our built in Integrations (or click 'Try Now' to try it with 25 responses). Currently 3 integrations are available, with many more to come soon.
- Google Sheets: Use a spreadsheet as a login and/or add responses automatically to a spreadsheet
- Gmail: Send a custom email to a respondent with merge tags of the quiz responses, scores, grades or outcomes.
- MailChimp: Subscribe lead captures to a list, track quiz responses from a campaign and update Merge Tags with quiz responses.
Our integrations rollout schedule is based on customer requests so please Contact Us to let us know what integrations you need!
Custom Integration
Our Javascript AND REST API is currently in 'Beta' testing and will published live soon.
My quiz is taking a long time to load
Some older computers may have trouble loading a bigger quiz for editing. If this is the case you can adjust the amount of questions that display at once in your account settings
- In your Account Dashboard click on the 'Account' section
- Scroll down to the heading 'Editor Settings' and change the number next to 'Group Questions Into' from the default (50) to a smaller number (eg: 10).
- Click 'Save' at the bottom of the page and then click on 'Quizzes' at the top and 'Edit' on your quiz to load it in the editor.
- You should be able to edit your quiz now with it only displaying (for example) 10 questions at a time instead of 50
How do I change the Share link for Facebook, Twitter, etc...
You can change most of the share details with the Share Details button on the 'Share' tab. If you are embedding the quiz on your own website there is a checkbox to make the links point to your page that the quiz is embedded on instead of the hosted page.
If you are using the quiz hosted on www.quiz-maker.com instead, you can change the URL for a hosted quiz using the Plugin 'Change the Share details on hosted quizzes'. Just add the plugin and set the URL and it will work.
How do I stop questions overlapping images
Some Themes have the question appear over the bottom of the pictures (if you add one). If this is making it hard to read your images you can easily change it by adding the Plugin 'Stop questions overlapping images'.
Can I A/B Test Questions in my quiz
Yes you can use Question Logic to make A/B Tests of individual questions, or groups of questions in your quiz.
Below is an example of how you would create the necessary logic for an A/B Test. If you had the following quiz you would use Question Logic to randomly select between two or more different questions (in this example Question 2A or Question 2B):
Example Quiz
Question 1
Question 2A (50% Chance) OR Question 2B (50% Chance)
Question 3
- On "Question 1" you would add 2 Logic items:
- "Randomly" "Skip to Question" "Question 2A"
- "Randomly" "Skip to Question" "Question 2B"
- On "Question 2A" you would add 1 Logic item:
- "Always" "Skip to Question" "Question 3"
Then when the quiz is run, it would 50% of the time select 2A and 50% of the time select 2B. You can adjust the percentage by adding more "Randomly" logic items on Question 1 or you could add more versions of Question 2.
Showing the Comments Section
If you want your respondents to be able to comment on your quiz you can add a Facebook Comment Section into your quiz results by ticking 'Show comments section' from the 'Results' section of the Settings tab. Your respondents will need to be logged in (or login) to Facebook to comment.