Poll Settings - Advanced - Poll Help
Setting a Start / End date
If you set a start and end date for your poll it will mean that people will only be able to respond to your poll during the set time frame - outside those dates/times they will be presented with a message either saying the poll hasn't started yet or has already ended. You can set either the start or end date or both and it will still work.
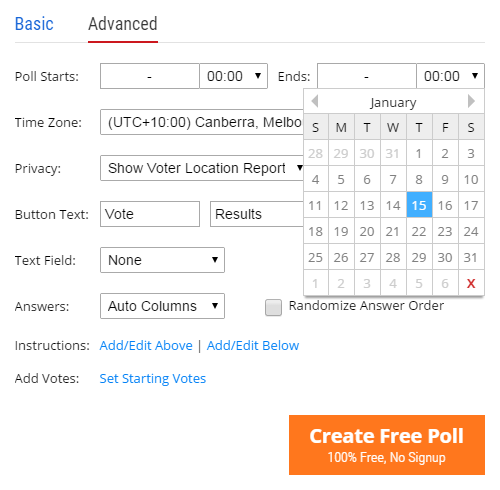
Set the dates from the 'Advanced' section of the Settings tab by clicking in the box to the right of 'Poll Starts:' or 'Ends:'. A drop down will appear with a calendar of dates
Using the Calendar
- Click the left and right arrows next to the month to change the month
- To change the year keep clicking the arrows to before January or after December
- Click the date that you want when you have found it
- Click the red X in the bottom right to remove the date completely
Start and End Time
Next to the date box is a drop down list to set the time. It is in 24 hour time so 00:00 represents 12:00 AM in the morning, and 23:30 represents 11:30 PM at night. You can only set the time in half hour increments.
Setting the Timezone
By default the Timezone should be set to your current one, however if it is not or if you need a different timezone you can change it using the drop down list directly below the start and end date boxes. The timezone set here will be applied to the start and end dates and will be the one used in all your reports and exported data.
Track or Do Not Track Voter Location
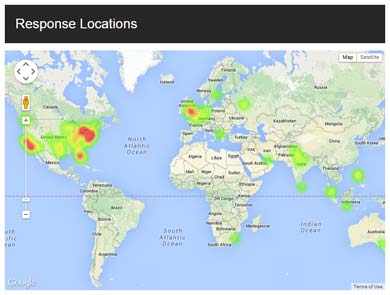
In the public results that appear after you finish the poll, you can Show or Hide a Location Heat Map of all votes from the 'Advanced' section of the Settings tab - change the 'Privacy' drop down to 'Show Voter Location Report'. If you choose to hide the reports you can still access them from your Account Results by creating an Account.
Not Tracking Voter Location
If you do not wish to track your voters locations for privacy reasons you can set the 'Privacy' drop down to 'Do not track Voter Location'. This will stop all tracking of the voter location and remove the map from your public results. The map will still appear in your Account Results but will not show any data because none is tracked.
Location Heat Map
The map shows the intensity of votes from each region of the world. Red indicates a large amount of votes, yellow indicates a moderate amount of votes and green indicates few votes. You can zoom in and out of the map with the vertical drag bar on the left of the map, and you can click and drag to move around the map.
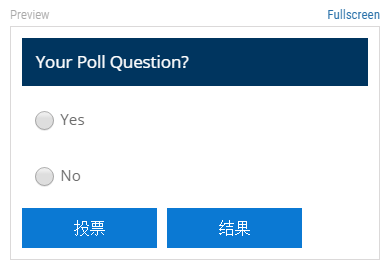
Changing the button text
You can change the text of the 'Vote' and 'Results' button from the 'Advanced' section of the Settings tab. This is useful for example to translate them into another language, or just to use your own wording.
To use your own button text, replace the text 'Vote' and 'Results' in the boxes next to 'Button Text'.
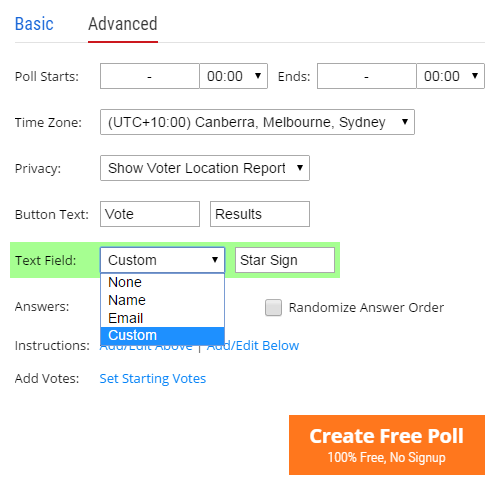
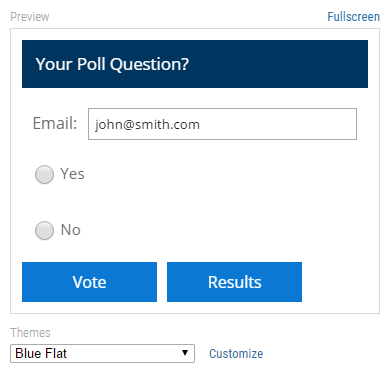
Asking for a name or email
If you wish to ask your respondents for their Name or Email address you can do so. Change the drop down marked 'Text Field' from the 'Advanced' section of the Settings tab.
You will see the text field appear in your poll preview with the 'Name' or 'Email' label or a 'Custom' label of your choosing.
Asking for a custom value
If you select 'Custom' from the 'Text Field' drop down list a new field will appear where you can type your own custom label and ask your voters to enter any text (or numerical) value.
Getting the 'Emails' or 'Names' Entered
You can view/download the emails or names entered from your Account Dashboard. Click on your poll from the list and then click Export to export your results to Excel, HTML or CSV. The exported results will contain the Emails/Names that were entered.
If you wish to just view the results then select 'HTML' from the File Type options and then click the downloaded file to view it in your web browser.
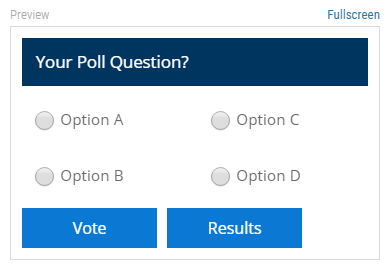
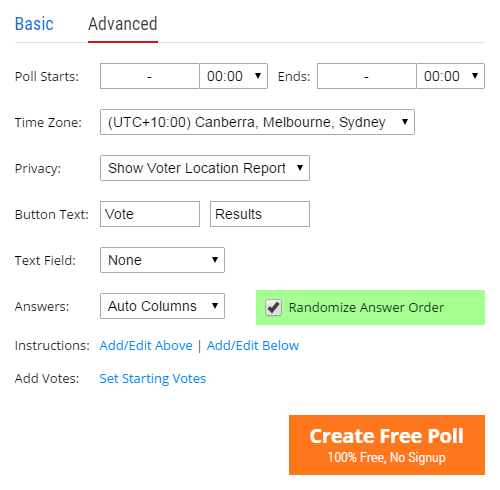
Display answers in multiple columns
If you wish to display your answers side by side or in columns you can do so from the 'Advanced' section of the Settings tab. The default setting is 'Auto Columns' which will automatically determine how many columns are needed based on the size of your answers, the presence of pictures and the width of your poll.
To manually set the number of columns change the 'Answers' drop down list from 'Auto Columns' to how many columns you need (up to 4).
Randomize Answer Order
To improve the accuracy of your results, or just to make a poll more interesting you can make the answers appear in a random order every time the poll is loaded. Tick 'Randomize Answer Order' from the 'Advanced' section of the Settings tab
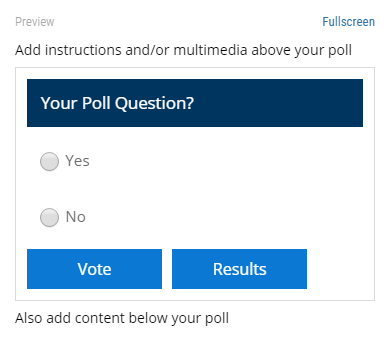
Add instructions to your poll
You can add instructions to the start and/or end of your poll from the 'Advanced' section of the Settings tab. Your instructions can be plain text or can include, links, pictures, sound, video or any valid HTML.
Next to the text 'Instructions' click 'Add/Edit Above' to add instructions to the top of the page above your poll. Click 'Add/Edit Below' to add instructions underneath your poll on the page. These instructions will be included in your embed code if you embed the poll, or on your poll page if you link to your poll.
Adding Advanced Content
You can use the buttons on the toolbar or the 'Insert' menu in the Advanced Editor to add links, pictures or video etc... If you are proficient in HTML you can click the 'Tools > Source Code' menu to directly edit the HTML of your instructions.
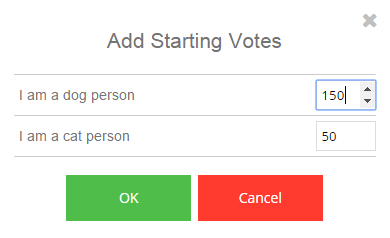
Import votes from an existing poll
To import votes from an existing poll click 'Add Start Votes' from the bottom of the 'Advanced' section of the Settings tab.
A new window will open up and you can set a starting vote value for each answer which will always be added to the total votes even if you clear the poll. You can remove or change the starting vote numbers from this same window.
These added votes will also never be filtered or removed by your Poll Security settings.